Avocado Chicken Salad

There are ingredients you should always have on hand in the summertime for easy, no-cook meals. Today’s recipe features most of my favorites. 

Rotisserie chicken – Less expensive than buying a whole, raw chicken! How could you pass this up? Use it in salads, on sandwiches, or serve with grilled vegetables this summer.

Avocado – Perfect on everything, from eggs to salads and sandwiches to guacamole on chips. 

Tomatoes, Red Onions, Limes, and Fresh Herbs – No need to cook these fresh tasting produce items! They’ll brighten up any summer meal. 

Since getting back from vacation I feel like working all day takes up so much time that I just don’t want to spend more than 20 minutes in the kitchen in the evening. I’d rather spend my nights feeling like I’m still on vacation with a glass of wine on the patio. This chicken salad is very refreshing with white wine. Try it with this amazing find at Trader Joe’s:

 
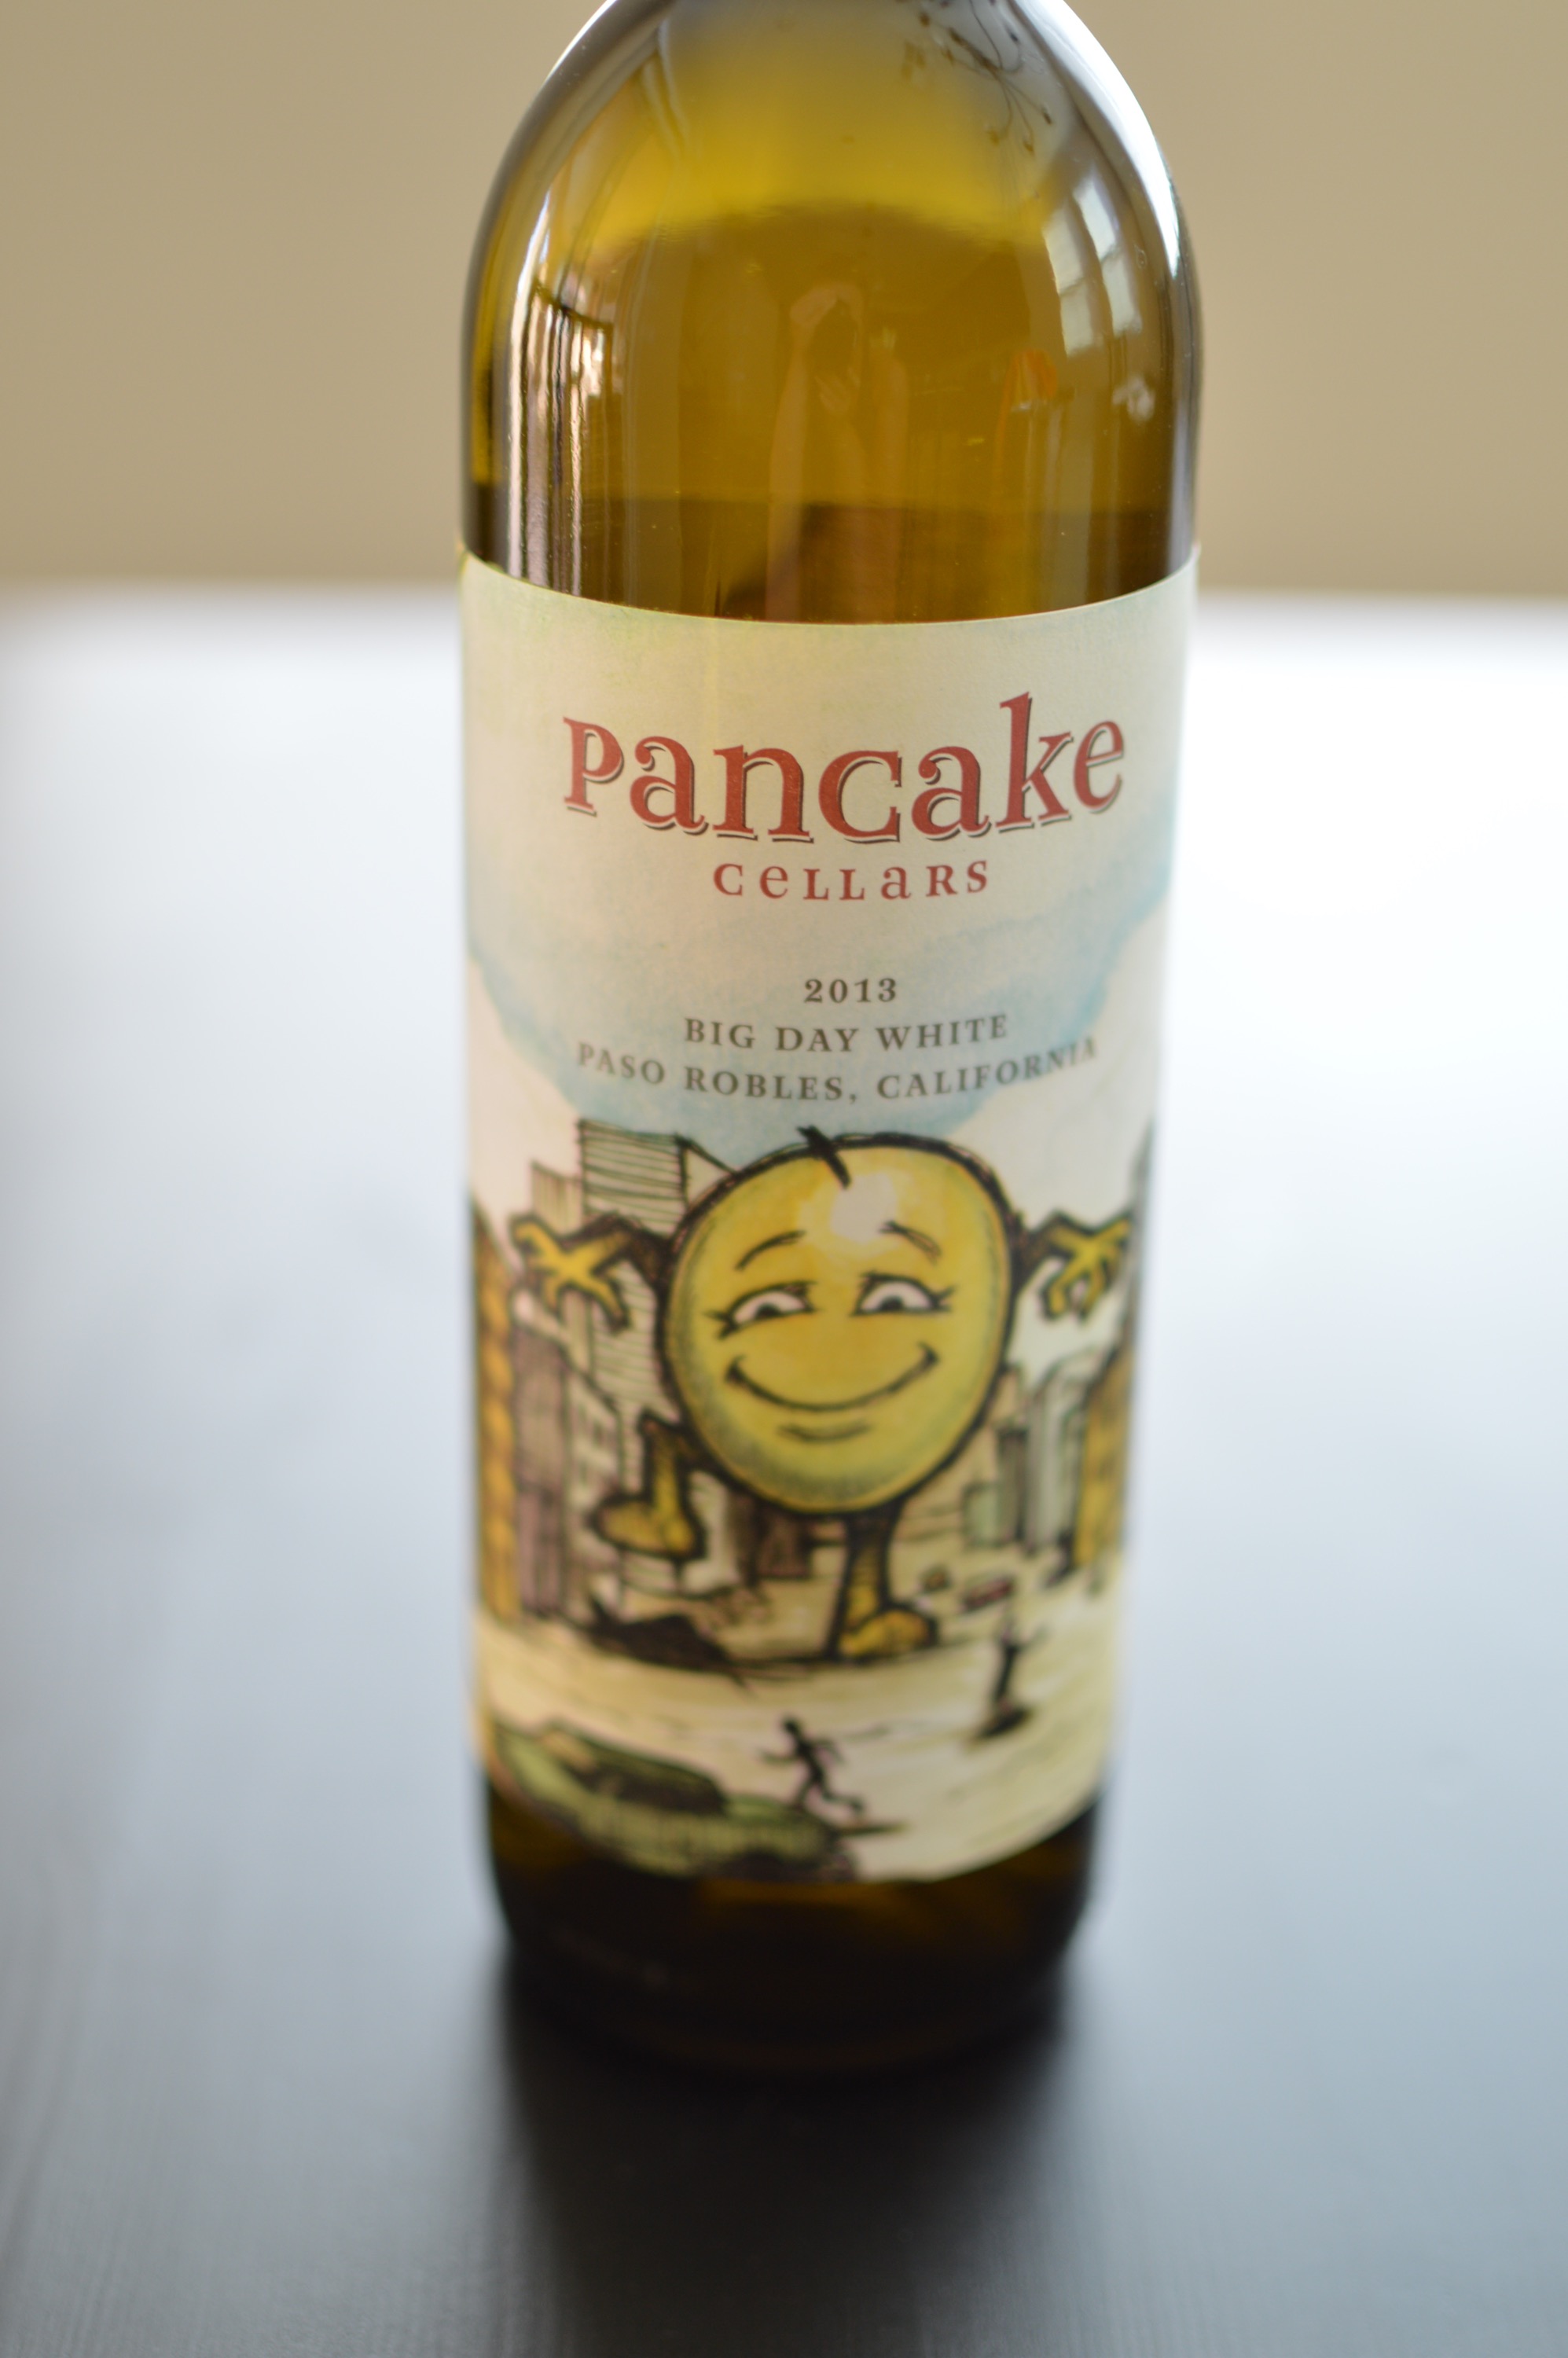
Pancake Cellars’ Big Day White is dangerously drinkable. It offers flavors of white peach, apple, cantaloupe, orange blossom, honeysuckle, and lemongrass. At least that’s what it says on the label. To me it just tastes like summertime perfection! Oh, and did I mention it’s only $5.99? 

Pour yourself a glass and get started on the salad!


Ingredients:

(Serves 1)

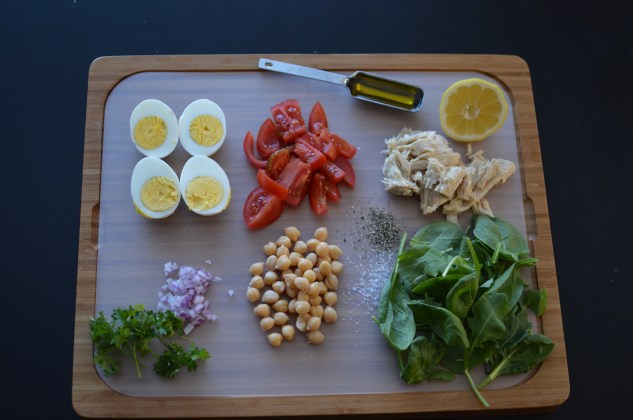
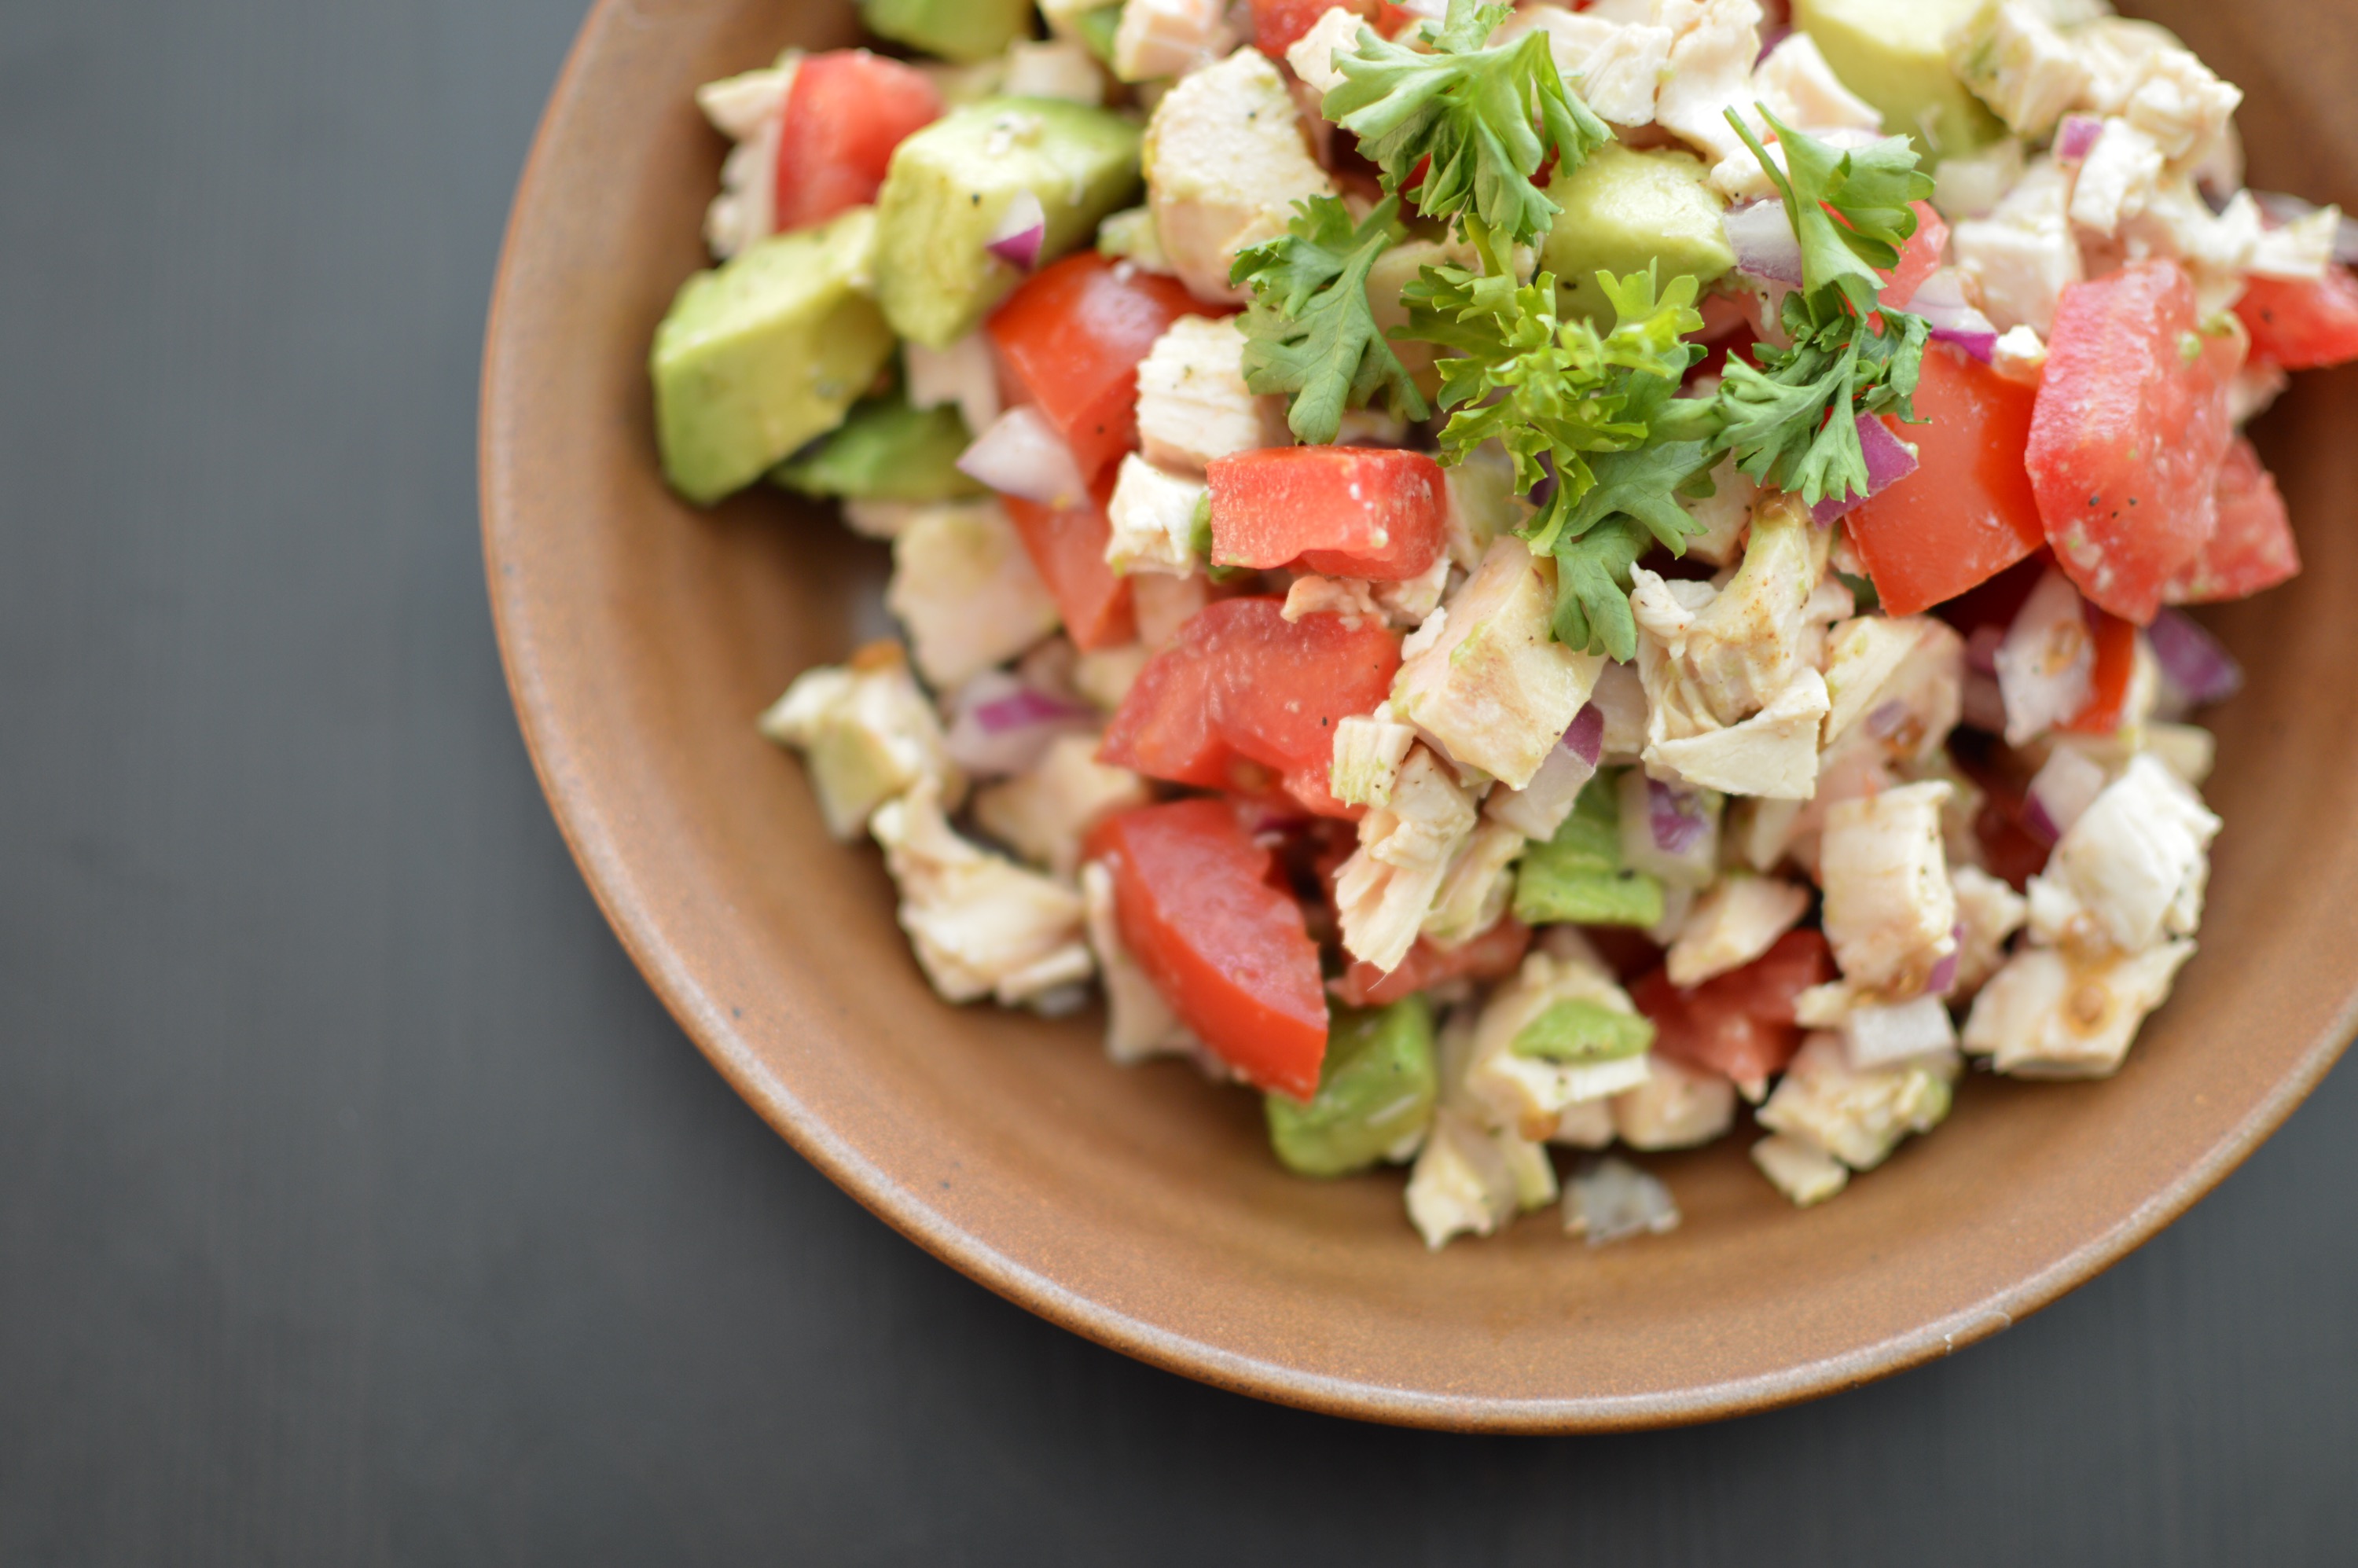
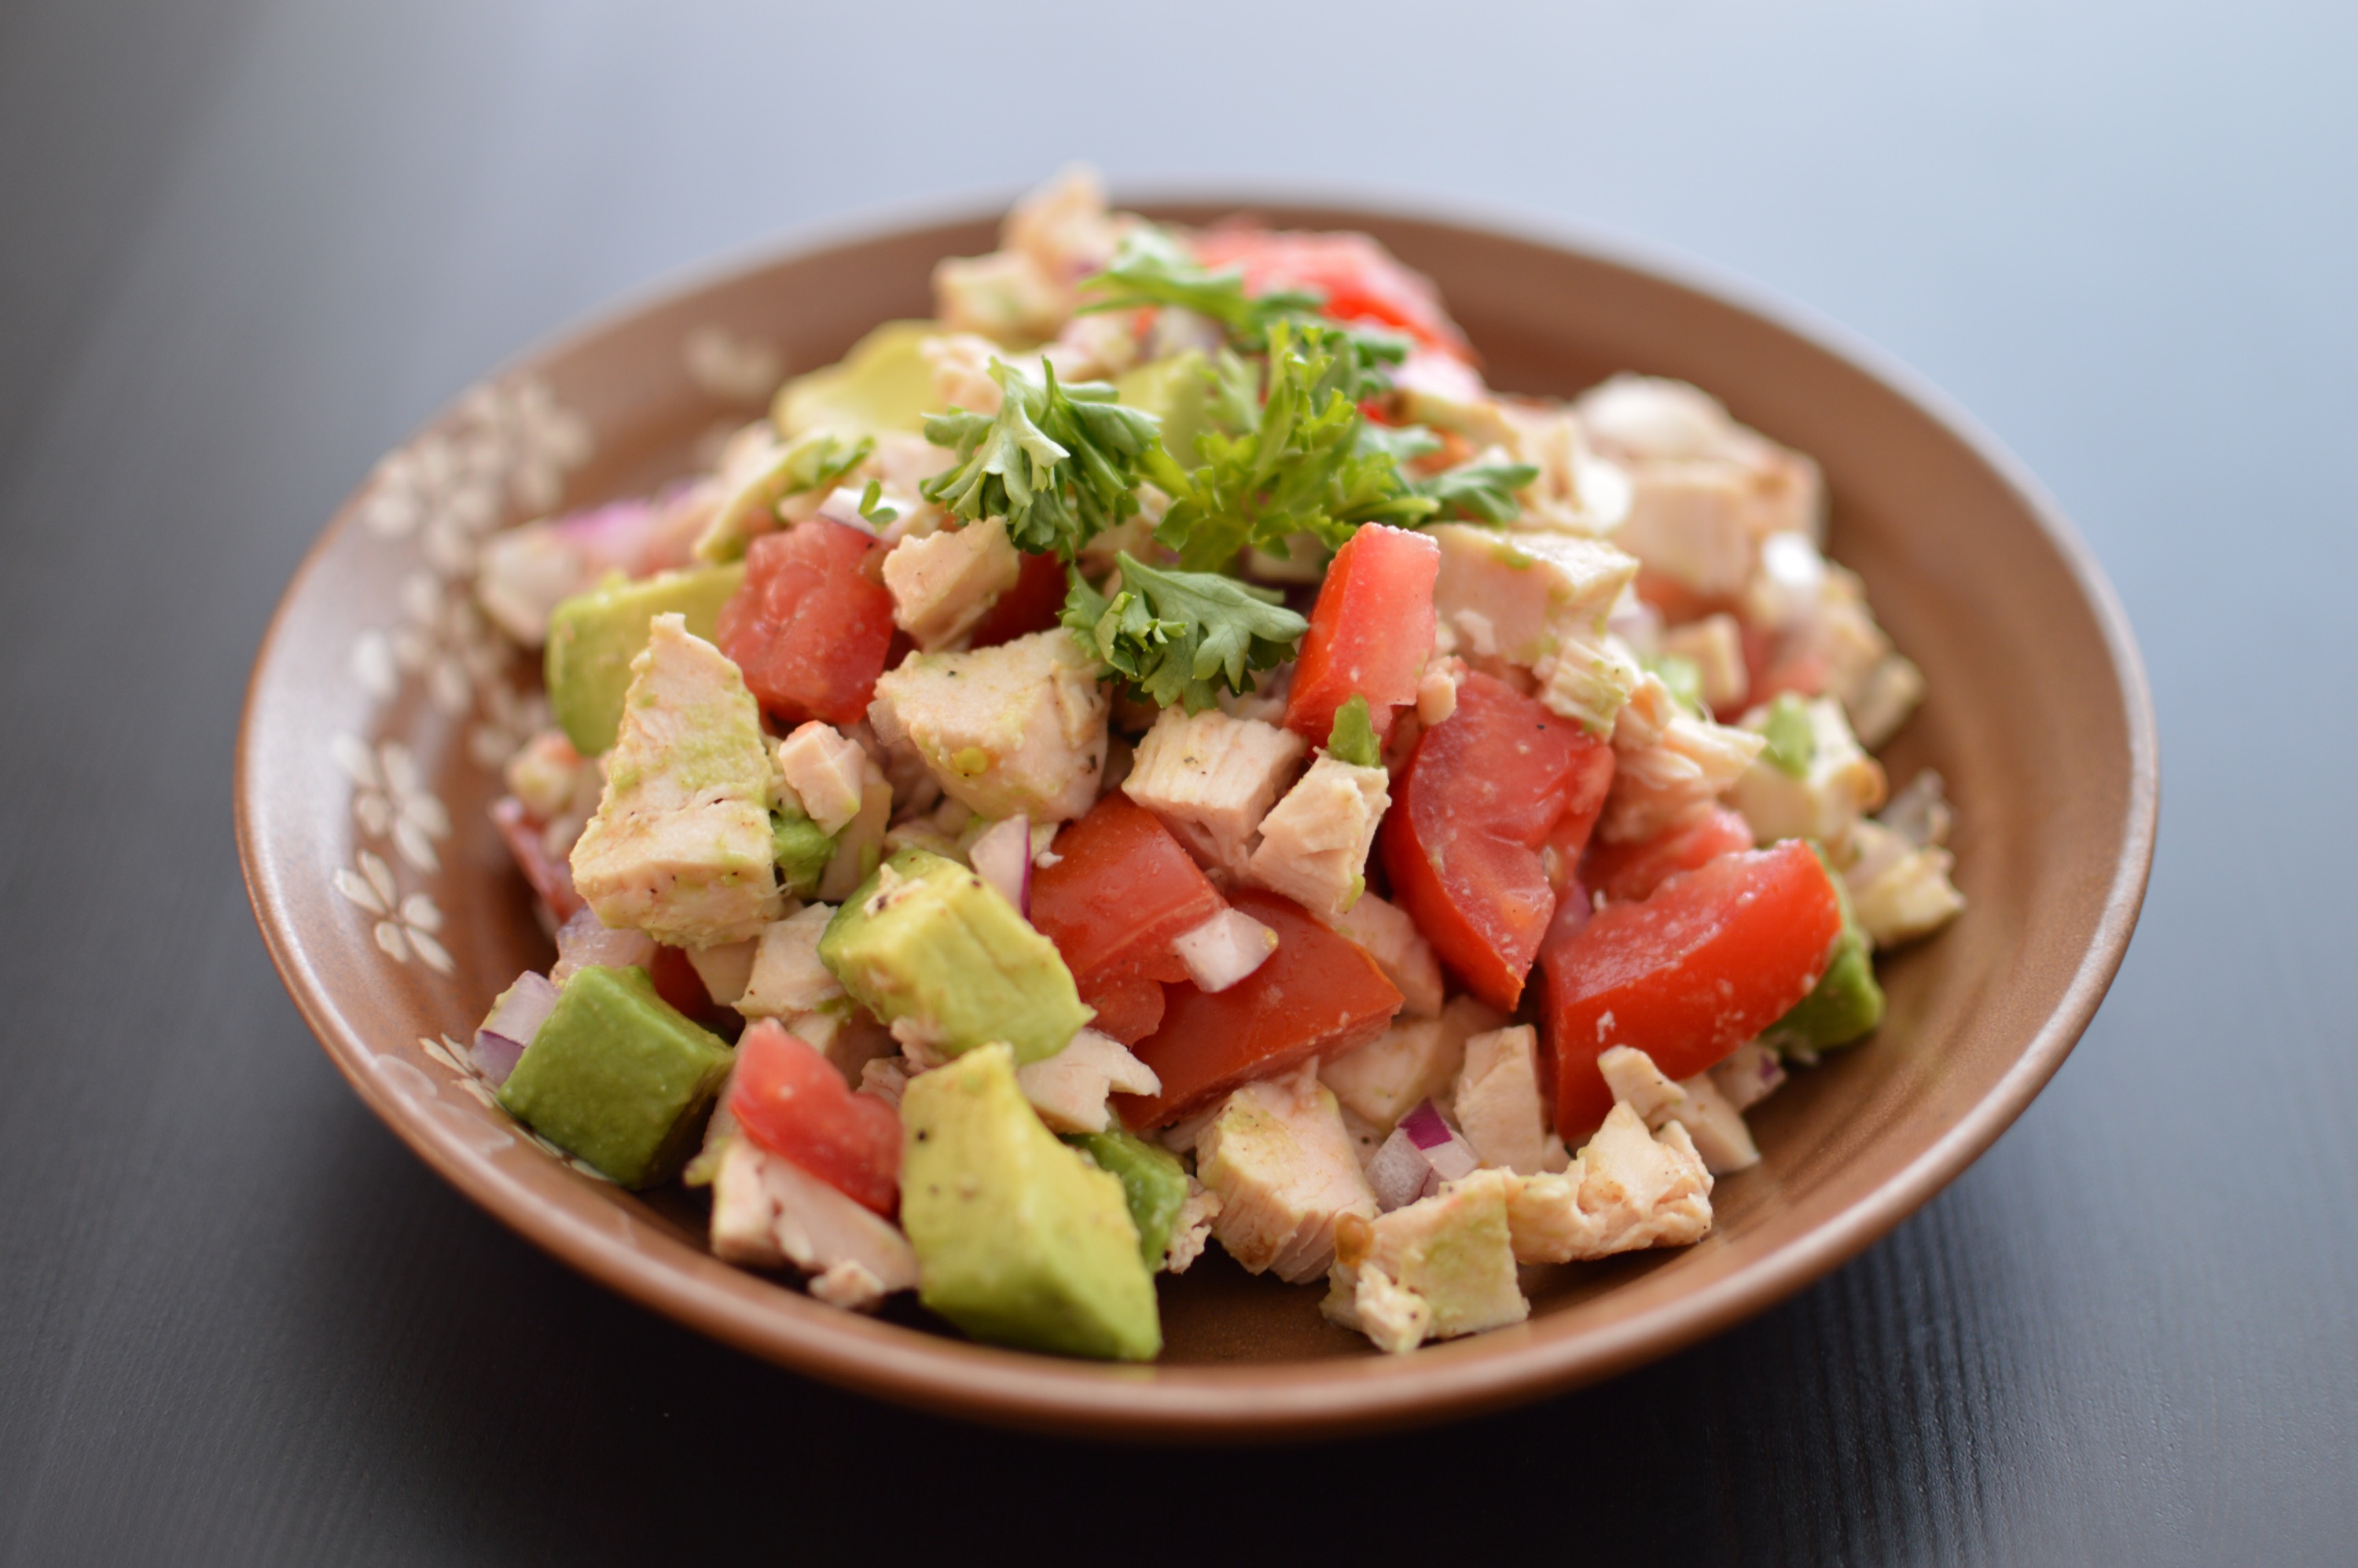
1 cooked chicken breast (5-6 oz, skin removed)

1 roma tomato, diced

2 tablespoons finely diced red onion

1/2 an avocado, diced

1/2 a lime, juiced

1/4 teaspoon cumin

Dash of salt and pepper

1 tablespoon fresh cilantro or parsley, chopped (optional)

Preparation:

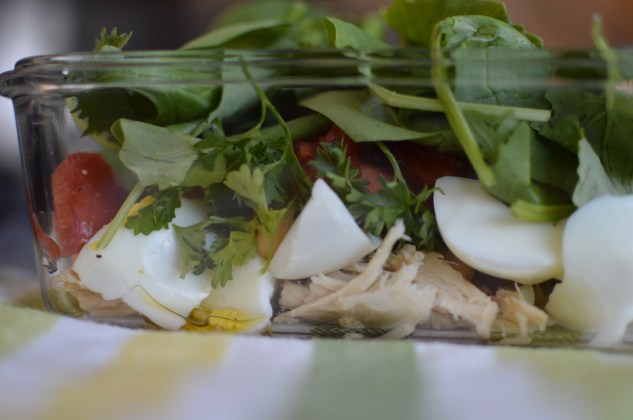
1. Gently fold together all ingredients in a mixing bowl and serve. Boom.

Easy, right? I just took a break from house cleaning for 10 minutes to make and eat this. Tidying up the house is much more fun with a glass of wine, Spotify’s “Cleaning the House” mix playing, and fueled up with this refreshing salad. 

  
I used rotisserie chicken in my salad, but you could easily use poached or grilled chicken breast instead. I’ll bet this is good with a swirl of Greek yogurt or sour cream added in. Enjoy!

What are your favorite summer meals and wines? 

Bacon and Eggs Breakfast Salad

Breakfast salad? Yes, please! I wrote this recipe for a contest using Davidson’s Safest Choice Eggs, which are pasteurized using a water bath process that eliminates the risk of Salmonella in eggs without changing their flavor or nutrient composition. These eggs are a a particularly great choice for recipes that do not call for fully cooking the eggs. Examples include smoothies, ice creams, salad dressings, sauces, and poached eggs. 

The poached egg in this recipe combines beautifully with the tangy lemon juice and savory bacon fat to make a dressing that will make a salad lover out of anyone! Don’t worry, it’s lightened up with the use of center cut bacon and substituting olive oil for a portion of the bacon fat. Enjoy this summer salad guilt free as a light dinner with crusty bread or accompaniment to brunch with friends. Oh, and don’t skip the step of massaging your kale! It’s worth the extra effort, as the bitterness of the leafy green will be mellowed by the lemon juice.

  
Ingredients:

1 bunch kale, purple or green

Juice of half a lemon

Dash of salt

1 tablespoon olive oil

4 slices center cut bacon, diced

1 tablespoon thinly sliced red onion

2 tablespoons distilled white vinegar

2 large eggs

2 radishes, sliced

Freshly ground pepper, to taste

Preparation:

1. Begin by tearing the leaves from thicker stems of the kale. Discard the stems and thinly slice the leaves. Place the kale in a large mixing bowl and drizzle with lemon juice, salt, and olive oil.

2. Massage the kale for 2-3 minutes with your hands, or until it is beginning to soften.

3. Cook the diced bacon in a frying pan over medium heat, stirring occasionally until golden. Add the red onion, sauté for 60 seconds longer, and remove from heat.

4. Bring 2 quarts of water to a simmer in a saucepan. Add the white vinegar. Break an egg into a small bowl or cup and gently pour into the simmering water. Using a slotted spoon, gather the egg white around the yolk. Repeat with the second egg. Cook for about 90 seconds for runny eggs, or up to 3 minutes for firmer eggs.

5. Top the massaged kale with the warm bacon and onion mixture and toss to combine. Divide the kale between two plates or shallow bowls. Top with sliced radishes, one poached egg, and freshly ground pepper. 

  
Don’t you love that poaching eggs isn’t as difficult as it seems? I think this method is fool-proof. I hope it works for you, too! 

What are you cooking this summer? Check out the links below for more safe egg inspiration!

*By posting this recipe I am entering a recipe contest sponsored by Davidson’s Safest Choice Eggs and am eligible to win prizes associated with the contest. I was not compensated for my time. 


Easy Crockpot Chili

Hello! I hope your week is going as awesome as mine is! I slept for 12 hours Saturday night and Sunday night, so all week I’ve been bursting with energy. I’m running more now that the temperature is perfect in the mornings… Hopefully it’ll stay this way for awhile! With running before work I’ve had less time for food prep. This crockpot chili has been the perfect solution! I make it once and it lasts all week. It’s so hearty and the acidity is well balanced with a bit of sour cream and cheddar cheese. This and other lower carb lunches I’ve been packing for work have my stomach feeling flatter, which is great since it’s almost pool season. I even folded laundry in a bikini yesterday! I’ll bet that if you eat this chili your tummy will be just as happy :)

  
Easy Crockpot Chili Recipe found here. The only changes I made to the chow.com recipe were to use a combination of red kidney beans and pinto beans and lean ground turkey instead of ground beef.

  
Oh, I also usedextra sharp cheddar on this one. You get the most flavor with the fewest calories that way… Which reminds me, I’ve been experimenting with Weight Watchers for the past few months to learn more about the program and see if it’s a good diet plan for my clients. I’ve noticed that fat “costs” you a lot of Points Plus, so using low fat or fat free products seems to be a good strategy for keeping to your Points Plus limit for the day. It’s a trade off, though. When you choose fat free cheese or sour cream, you get fewer calories but a more processed product. So what’s better for weight loss? What do you think?? Would you use full fat sour cream and cheddar on this chili or go for fat free cheddar and fat free Greek yogurt/ sour cream? BTW, if you’re interested in a full review of the Weight Watchers personal coaching program, please let me know! I’m thinking about doing a post about it.

One more chili pic.. Yum!


Turkey and Quinoa Stuffed Peppers

This month’s Recipe Redux theme is “Spring Cleaning!” Clearly, my pantry is still in need of it:

Never mind. I was going to include a picture of the mess in there, but it’s too embarrassing! 

As I was going through my pantry to find an ingredient for this month’s challenge, I found an entire Costco sized package of canned tomato sauce. Well, if you’ve ever accidentally bought too much tomato sauce like I did, I have a great recipe you can put in your lunch or dinner rotation now!

  
Turkey and Quinoa Stuffed Peppers


Ingredients (makes 6):

6 bell peppers: red, orange, and/or yellow

15 oz can tomato sauce

1 cup dry quinoa

2 cups chicken broth or water

16 oz lean ground turkey

2 tablespoons olive oil

1 medium onion, diced

1 small can diced green chilis

3 garlic cloves, chopped

Taco seasoning, to taste

6-12 oz shredded cheese (I used 2% fat Mozzarella)

Preparation:

1. Remove the tops and seeds from each bell pepper. Heat a large pot with enough boiling water to just cover the bottom below a steamer basket. Place bell peppers in the steamer basket and steam, covered, for about 5-10 minutes or until desired tenderness is achieved. You can boil the peppers submerged in water to soften them instead. Remove the peppers, pat dry with a paper towel, and allow to cool on an aluminum lined baking sheet.

2. As the peppers cool, toast the dry quinoa in a saucepan, stirring frequently for 2 minutes. Add 2 cups boiling water or broth and reduce heat to a simmer. Cook covered for 15 minutes or until liquid is absorbed.

3. While the quinoa is cooking, sauté the onions And garlic in 2 tablespoons of oil in a large skillet over medium heat. Once softened and golden, set aside. Brown ground turkey in the pan until there is no pink visible and the meat is in small crumbles. 

4. Stir taco seasoning, tomato sauce, cooked onions, cooked quinoa, and diced green chilis into the turkey. 

5. Distribute the meat and quinoa mixture evenly among the bell peppers, top each one with 1-2 oz shredded cheese, and broil until golden and bubbly.

  
These reheat well in the microwave and pack easily for lunch at work! Enjoy with a side of salad. 

  
Check out other Recipe Redux creations below:

Favorite Workday Salad

I love finding a portable meal that’s flavorful, protein rich, and easy to prepare multiples of for the week! This salad has been my go-to for two weeks now and I’m still not tired of it.

Ingredients:

2 eggs or 3 egg whites, hard boiled & chopped

1/2 can of tuna

1 medium tomato, diced (or 1/2 cup grape tomatoes sliced lengthwise)

2 tablespoons finely diced red onion

1/2 cup garbanzo beans

1 tablespoon fresh chopped parsley

Large handful of spinach or mixed greens

1 tablespoon olive oil

Squeeze of lemon

Salt & pepper to taste

Preparation:

1. Place eggs in a pot of cold water. Bring to a boil. Cover, remove pot from heat, and set a timer for 12-15 minutes. Run the eggs under cold water to stop the cooking process and make them easier to peel.

2. Layer all ingredients except for greens in a bowl or travel container. Add lemon juice, olive oil, salt, and pepper.

3. Top with mixed greens or spinach.

4. When ready to serve, stir or shake to combine all ingredients.

And done! I like to make 2-4 of these at a time to keep in the fridge for lunch on weekdays. They hold up well as long as the spinach/greens are on top!

Enjoy!

Carrot Cake Protein Pancakes with Greek Yogurt Cream Cheese Frosting

How can something so healthy taste so decadent? I don’t understand it, but I’m so excited to share this recipe with you! I’m always looking for tasty ways to use up the leftover pulp from my juicer. This recipe is perfect for using up carrot or carrot/apple pulp! You can even freeze the pulp in a sandwich bag if you want to make this pancake recipe another time. 


For 5-6 pancakes (serves 2)

 Ingredients:
1 cup grated carrot (or 1 cup carrot pulp from a juicer)
1 cup skim or almond milk
1 egg or 2 egg whites
1 tablespoon lemon juice
1 tablespoon brown sugar Splenda blend
1/2 teaspoon cinnamon
1/8 teaspoon ginger
1/8 teaspoon nutmeg Dash  ground cloves
1 teaspoon vanilla extract
1 scoop vanilla whey protein isolate 1/3 cup all purpose flour
1 teaspoon baking powder
1/2 teaspoon baking soda
1/4 teaspoon salt

For the Icing:
2 ounces Greek yogurt cream cheese
1-2 tablespoons milk
2-3 packets stevia
1/2 teaspoon vanilla extract
1/4 teaspoon grated orange rind

Directions:
1. Combine all ingredients from grated carrot down to vanilla extract in a large mixing bowl. Whisk together and allow to sit for 5 minutes to absorb liquid.
2. In a separate bowl, stir together remaining dry ingredients (protein powder through salt).
3. Add the dry ingredients to the wet ingredients and stir together to incorporate.
4. Cook the pancakes on a lightly greased pan or griddle, flipping carefully when bubbles begin to form around the edges.
5. To make the icing, combine icing ingredients in a small bowl and mix well using a fork or whisk until smooth.
6. Serve pancakes topped with icing and chopped nuts.


Yes, they’re as tasty as they look! I hope you’ll try them out!


Half the recipe= 280 calories, 5 g fat, 24 g protein, 34 g carbs

High Protein Chocolate Coconut Granola

I love Greek yogurt, but after eating it for a snack five days a week for at least a year, I decided it needed some sprucing up. Nothing brings life to a cup of yogurt like granola! This version can be made crispy or chewy and you can make 12 servings in under an hour. Granola you buy at the store is typically high in sugar and fat, but this granola has a higher protein content thanks to the addition of whey protein isolate and lower in fat and sugar. The combination of chocolate chips, toasted coconut, and roasted almonds make it taste like a candy bar! Irresistible!

High Protein Granola Recipe

Ingredients:
(12 servings)

3 cups whole grain rolled oats (not instant)
1/4 cup shredded coconut, sweetened or unsweetened
1/4 cup sliced almonds1/3 cup maple syrup
1 tbs coconut oil
1/2 cup unsweetened apple juice
2/3 cup vanilla whey protein isolate
1/2 teaspoon salt
2 teaspoons vanilla extract
1/4 cup mini chocolate chips

Preparation:

1. Preheat the oven to 325 degrees. Line a large baking sheet with parchment paper and set aside.
2. Combine the oats, shredded coconut, and slivered almonds in a mixing bowl.3. Whisk together apple juice, maple syrup, coconut oil, whey protein, and salt in a small saucepan. Heat over medium, whisking occasionally, until thickened and beginning to bubble. Add the vanilla extract.
4. Pour the hot liquid over the oats and stir together with a spatula to coat evenly. Pour the sticky oat mixture onto the parchment lined baking sheet and use the spatula to spread it out evenly.
5. Bake for 30-40 minutes, stirring or flipping the oats once or twice with a spatula partway through.
6. The granola is done when it is dry (or mostly dry if you prefer a chewy granola). Allow to cool completely before adding chocolate chips. Store in an airtight container.
high protein granola recipe

For a different variation, try adding a dash of cinnamon, nutmeg, ginger, and ground cloves to the oats instead of coconut and dark chocolate. Enjoy a handful on its own, as a yogurt topper, or with your favorite cereal!

High Protein Granola recipe

Juicer Pulp Turkey Burgers

January’s Recipe Redux theme is “Start Smoking in the New Year!” The idea is to flavor up recipes with a bit of smokiness or spice. My base recipe was a turkey burger, but I wanted to find a way to bulk it up with extra vegetables and impart a smoky, savory flavor. I loved thekitchn.com’s guide to adding smoky flavor to foods! I used a few of the ideas listed for my turkey burgers. I also added some pureed vegetables leftover from my juicer to make the burgers extra moist and nutritious. If you don’t have a juicer, you can use any of your favorite grated or pureed vegetables!

2015-01-10 15.47.50

Ingredients:

1 lb 93% lean ground turkey
1/2 cup pureed or shredded vegetables (I used pulp leftover from kale, celery, and cucumber juice)
1 large egg
1/4 cup oat flour (dry instant oats pulverized in a blender)
1/2 tsp Worcestershire sauce
1 tbs minced onion
1/2 tbs minced garlic
1/2 tsp smoked paprika
1/4 tsp cumin
Salt and Pepper to taste (Don’t taste the raw meat! Instead, cook a bit of it on a hot skillet to test the flavor)
High heat stable oil, such as avocado or canola

Directions:

1. Gently fold together all ingredients in a mixing bowl until well incorporated.
2. Wet your hands to form the mixture into four 4″ diameter burger patties. Refrigerate for 20 mins – 2 hours to allow the flavors to combine.
3. Preheat the grill to medium-high. Oil the grates or the burger patties to prevent sticking. Grill 5-10 minutes and flip with a grill safe spatula. Cook until internal temperature reaches 160 degrees F. Transfer to a plate and cover with aluminum foil; temperature should increase to 165 degrees F while the burgers are resting.
4. Serve over lettuce or on toasted buns with Sriracha sauce, roasted red peppers, and pepper jack cheese.

2015-01-10 15.47.32

Check out other Recipe Redux ideas for January 2015!

Greek Yogurt White Wine Ice Cream

Why ice cream in January? Because weather in Vegas is great and I just got an ice cream maker for Christmas! Hear some of the things I’ve learned about the science of making ice cream in episode #71 of the Beta Sandwich Science Podcast. It’s amazing that all the ingredients and steps in making ice cream serve a specific purpose in making a delightfully creamy frozen treat.

Next, enjoy this delicious frozen greek yogurt “ice cream” flavored with dry white wine and a splash of lemon juice. (recipe found on serious eats, one of my favorite places to find cooking tips and recipe ideas). Like they say, the fatty and tangy Greek yogurt brings out the floral, honey, and citrus notes of dry white wine the way that a splash of water can “open up” a scotch or bourbon.

Typically, egg yolks are a helpful addition in ice cream recipes because they help to emulsify the base. In the case of Greek yogurt ice cream, the high protein content of the yogurt sufficiently emulsifies the mixture. The result is silky, tangy, and sweet. Enjoy!

2015/01/img_0161.jpg
Ingredients:
-2 cups full fat plain Greek Yogurt (I used 500g of Fage Total)
-3/4 cup sugar
-3/4 cup dry white wine
-lemon juice and salt to taste

Preparation:
1. Whisk together wine, yogurt, and sugar in a large mixing bowl until the sugar dissolves and ingredients are well incorporated.

2. Add lemon juice and salt 1/4 teaspoon at a time to adjust the flavor to your liking.

3. Process in an ice cream maker according to device instructions. (Approximately 15 minutes)

4. Dish up right away as soft serve frozen yogurt or place in the freezer for a few hours to allow it to harden more.

Because of overrun, or the increase in volume of the ice cream mixture, this recipe easily serves 8. Check out the nutrition facts below:

2015/01/img_0163.png
This would be delicious with fresh berries. I don’t think I’ll be buying fro-yo from the store anymore. Homemade Greek yogurt ice cream is just so easy and GOOD! Next time I’ll play around with subbing some of the sugar for stevia; it should be great as long as it’s served soft. Fully freezing sugar free ice creams and frozen yogurts can make them very hard, but soft serve shouldn’t be a problem.

2015/01/img_0162.jpg