
By posting this recipe I am entering a recipe contest sponsored by Nestlé Health Science and am eligible to win prizes associated with the contest. As a participant in this contest, I also received a free trial sample of ProNourishTM, a low FODMAP nutritional drink developed by Nestlé Health Science. I was not compensated for my time.
Did you grow up loving instant ramen noodles as much as I did? They’re still a treat I crave when my throat is sore or the weather is gloomy. Today, I want to show you a grown up version of this convenient and comforting soup. It’s perfect for bringing to work- just add boiling water!
This recipe is Low FODMAP. People diagnosed with irritable bowel syndrome, IBS, often benefit from following a low FODMAP diet. FODMAP is an acronym for Fermentable Oligosaccharides, Disaccharides, Monosaccharides And Polyols, which classifies specific types of short-chain carbohydrates that can trigger digestive distress in some people. Often times, anxiety causes these individuals to avoid all foods and food categories that give them discomfort — or fear will give them discomfort — which can unintentionally minimize their nutritional intake. After serious medical issues are ruled out, a registered dietitian nutritionist can help identify individual FODMAP triggers while minimizing food elimination and maximizing nutritional value.
You can watch an excellent video explaining the way FODMAP malabsorption can cause intestinal distress on the Monash University Website.
One of the most challenging foods to eliminate without sacrificing flavor are garlic and onions. It’s hard to imagine a delicious broth based soup without these ingredients! Most bullion cubes and concentrates contain garlic and/or onion powder. If these cause you GI distress, Savory Choice brand broth concentrates are a good option. The chicken, turkey, and beef broths are garlic and onion free. The trickiest part about developing a low FODMAP recipe is knowing which ingredients are “safe” to use. Monash University created an app with a very long and comprehensive list of foods to choose and those to avoid when you suffer from IBS.
After some brainstorming and checking low FODMAP food lists, it felt like an accomplishment to create a low FODMAP recipe that’s nutritious and doesn’t sacrifice flavor! I hope you enjoy it. As an added bonus, it’s totally portable and convenient to pack for lunch. Just add boiling water :)
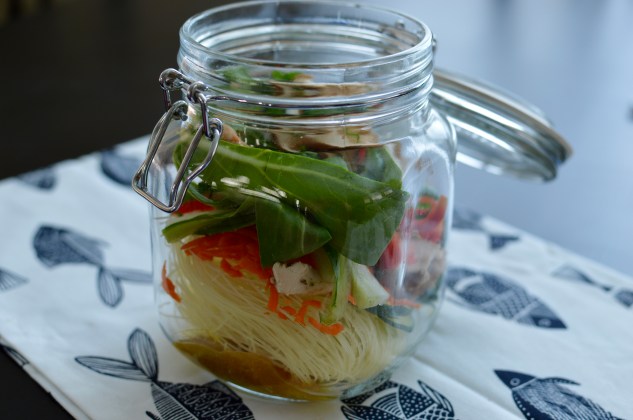
If you want to make your own variation of this soup, be sure to use ingredients that don’t need to cook for long. Vermicelli rice noodles are perfect for this, but you could substitute in other par-cooked gluten free grains. If you use hard vegetables, be sure to cut them very thin so they will soften with the boiling water.

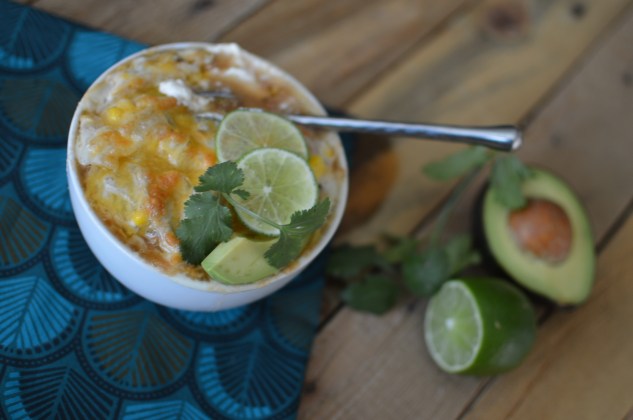
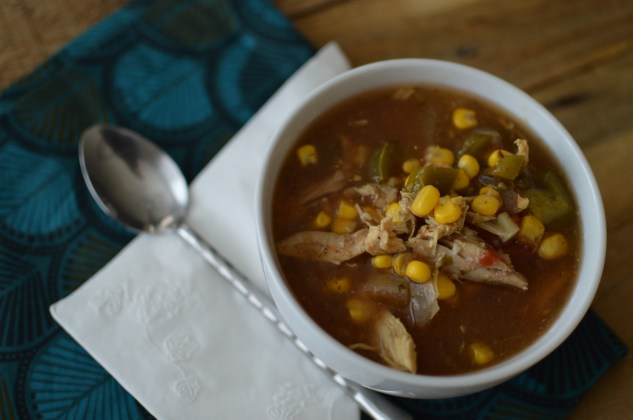
DIY Instant Noodle Soup
An easy, low FODMAP lunch that's convenient and portable.
This recipe was developed using low FODMAP ingredients but the recipe itself has not been tested for its FODMAP content.
Ingredients
- 2oz vermicelli rice noodles
- 1 tablespoon onion & garlic free chicken broth concentrate
- 1/4 teaspoon lemongrass paste
- 1/4 teaspoon ginger paste
- 2 oz cooked chopped chicken breast
- 2 tablespoons sliced shiitake mushroom
- 2 tablespoons grated carrot
- 2 tablespoons chopped bell pepper
- 2 tablespoons thinly sliced zucchini
- 1 leaf of bok choy, thinly sliced
- 1 tablespoon chopped cilantro
Directions
- Combine all ingredients in a pint sized or larger jar. Seal and refrigerate until ready to eat.
- Add boiling water, stir, cover, and allow to sit for 5 minutes.
- The soup is ready to eat once the noodles and vegetables are tender.
Check out these simple, nutritious ingredients. This soup will have you feeling fab without FODMAPs!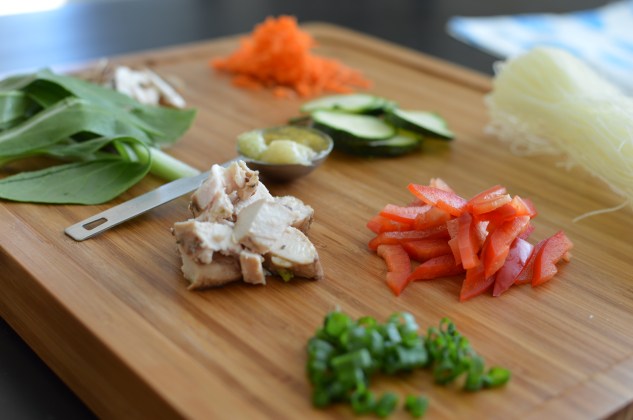
I’ll be packing it for work on the reg.

I first became familiar with the low FODMAPs diet a few years ago when I was trying to figure out which foods were making me feel bloated and gassy. I hated feeling that way all the time. The clients I’ve worked with have experienced relief from their IBS symptoms by eliminating certain foods. If you suffer from GI symptoms, the Low FODMAP Central website is a great place to get started with next steps.
Check out more low FODMAP recipes through the link-up below:


