Pregnancy Update: 37 weeks


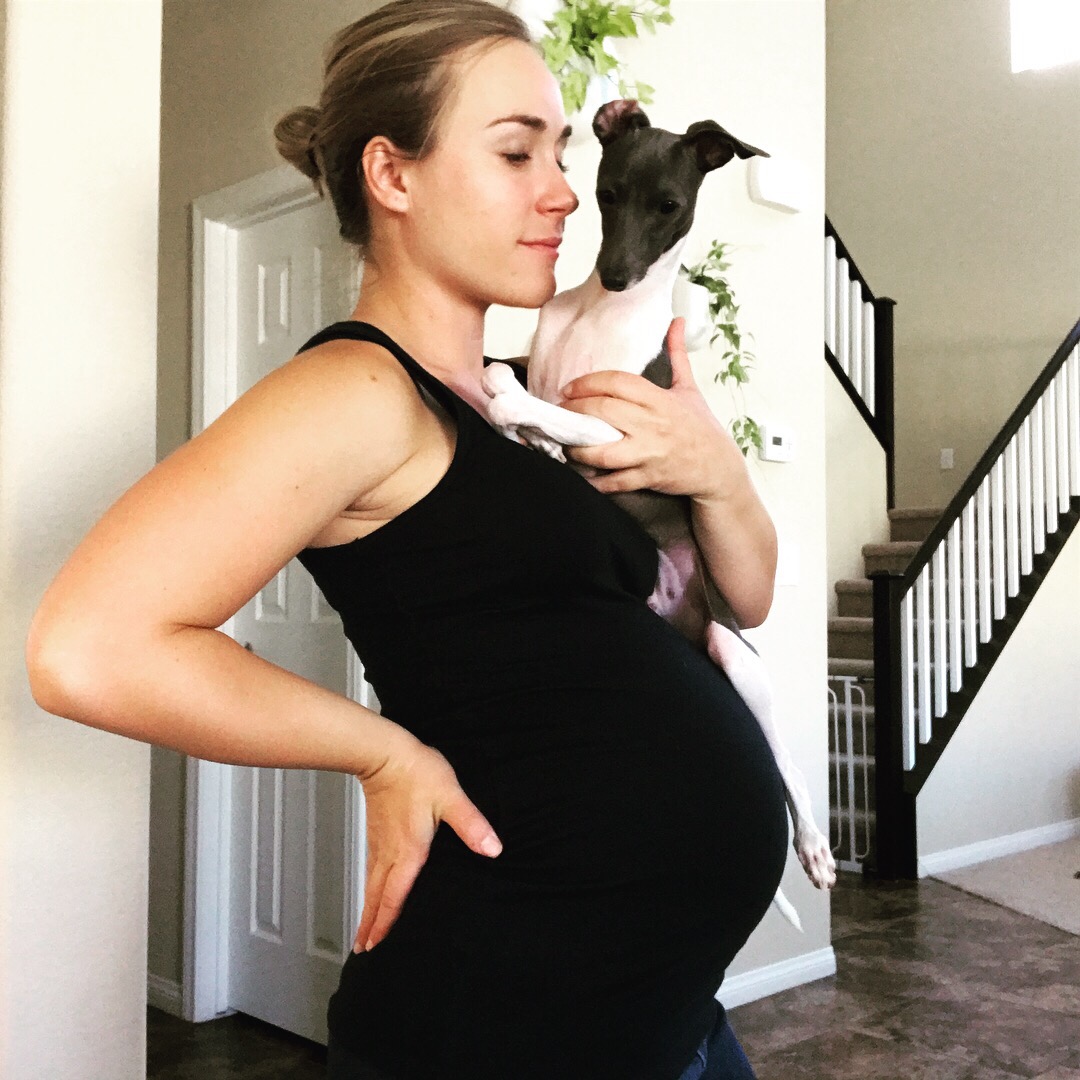
37 weeks is basically full-term, right? Everly could be arriving any day now… I’ve always heard that the last month of pregnancy feels like the longest. I think part of what makes it feel so long is the uncertainty of when the baby is going to arrive! Each day feels like another slow and steady round of a CrossFit EMOM workout. The day starts with wrestling my compression socks for five minutes, then going to the gym, then savoring a cup of coffee, then doing the surprisingly exhausting task of showering and getting dressed for work, then listening to an audiobook on breastfeeding on my way to the office, then seeing patients till lunch, then napping for an hour on the floor in my office, then eating oatmeal and drinking lots of water with some psyllium husk to prevent constipation, then elevating my legs between nutrition classes, and then finally driving home to plop myself down on the couch with my sweet dogs. When it’s a really good day, Colby comes home in time to give me a foot rub before bed. Absolutely no chores are getting done around the house lately, but that’s ok. I’m honestly feeling pretty good overall!

The most stressful week of my pregnancy was week 34. At the start of that week, the swelling in my arms and legs suddenly got much worse and my blood pressure went up. Protein was detected in my urine and my doctor started to worry that I might be developing pre-eclampsia. She ordered some bloodwork and a 24 hour urine test to keep an eye on things. I collected every drop of urine in a jug and on a Monday morning I went in to drop it off and to get a “quick blood pressure check.”

That’s when things started to get a little more stressful. I waited in the office for nearly an hour just to get my blood pressure checked. I got super frustrated at the situation because this “quick check” was taking so long that I was going to be late for work. By the time I was called back, I was so mad that my blood pressure was through the roof. I was put on a fetal NST (non-stress test) monitor and was swabbed for fFN (fetal fibronectin). The NST showed that I had an irritable uterus (LOL). I totally thought this was a made-up term, but apparently it’s a real condition in which the uterus contracts in a random twitching manner. I couldn’t feel these contractions so I didn’t think much of it. I had to come back the next day for more monitoring and to get the result of my fFN test.

I was a little more concerned on Tuesday because my fFN came back positive- which meant that I was likely to go into premature labor within the next 7-10 days. The doctor recommended getting betamethasone steroid injections to speed up baby’s lung development just in case. I was frantically reading up on these injections and felt totally spooked because there’s no clear consensus on whether the benefits outweigh the risks of these shots when given between 34 and 36 weeks. After talking to the doctor, I decided to get the two part shot. I continued to feel shitty the rest of week 34, gaining a total of 12 lbs of fluid in my legs, arms, and face rapidly. Then, magically, week 35 came and I felt a lot better! I even lost 4 lbs of edema while maintaining a healthy level of amniotic fluid. Everything went back to normal, including my blood pressure and the contractions quieted down. One of the best/worst things about the pre-eclampsia scare was my doctor’s decision to put me on bi-weekly NST monitoring. As inconvenient as it is, I’m grateful to get to have the nurse keeping an eye on Everly’s heart rate and movements as well as my contractions and amniotic fluid levels frequently. It gives me great peace of mind!

The crazy thing now is that my cervix is starting to dilate and I continue to have contractions on the monitor! Apparently I could go into labor anytime now- it could be a few hours, a few days, or a few weeks. I go back today to see how things are progressing.

My Birth plan:

I’m going to discuss my questions about having a birth plan with the doctor this morning. It seems like a silly idea to write out exactly how I expect labor and delivery to progress. Anything could happen, so I want to stay flexible and open minded. I’m open to getting an epidural if labor is very painful. I’m ok with having the doctor do any procedure that is medically necessary and follow accepted OB practices and guidelines. I’m not going to pretend that I know better than my doctor.

I really hope I can avoid tearing or having an episiotomy. I’m going to ask what my doctor thinks about the effectiveness of preventative measures because I’ve heard that perineal massage can be helpful for preventing tears and episiotomies in first time moms. I’ve also read that warm washcloths and oils can help to stretch the skin when baby is crowning. The part about childbirth that is unsettling to me is that it’s hard to know exactly how big baby will be and whether she will fit on her way out.

I have some ideas about how to make labor and delivery more comfortable. I’ve packed my hospital bag with a cozy robe, nursing sleep bra, and slippers to change into after giving birth. I’m also bringing a few things to make the sensory experience of pushing a baby out less painful.

Breathing: I’m going to breathe through the pain the same way I breathe through the discomfort of challenging workouts. This might mean slow, cleansing breaths or shallow bracing breaths. I’ll probably use a combination of the two. I haven’t taken any official breathing classes, such as Lamaze, but I hope that doing tough CrossFit workouts throughout pregnancy will improve my mental game during the marathon workout that is labor.

Sight: I will probably focus on a single point in the room the same way I do when doing heavy lifts or stringing together double unders in CrossFit. I might dim the lights in the room if the lighting is harsh.

Smell: I bought the same Pure Fiji pineapple massage oil that I use during my prenatal massages at Belly Bliss Spa! This stuff smells incredible- just like fresh, sweet pineapples.

Touch: I’ve looked up some YouTube videos on giving hand, foot, shoulder, and back massages. My plan is to have Colby massage me with the pineapple oil between contractions to keep my relaxed. I’ve been loving foot rubs at home to make my swollen feet feel better! I’m glad Colby is up for this task. I’d love to have a massage therapist doula in the room with me, but that’s really expensive and I am set on getting through childbirth without a doula.

Sound: I called Belly Bliss Spa to find out what soundtrack they use in their massage rooms. Can you tell I’m a little obsessed with the prenatal massages I’ve been getting? They said they use a Pandora station based on the artist Deuter. I looked him up and he happens to be Polish! What a nice coincidence. If the spa music is too mellow for me in the end, I might play something more upbeat like Eye of the Tiger and other motivational music on my portable speakers in the room.

Taste: I don’t think I’m allowed to eat or drink anything once I’m in active labor, but I packed some snacks for Colby and I’m hoping to have a little champagne toast after giving birth :)

Childbirth class

Colby and I took a childbirth class at Sunrise Hospital. I chose that one over the one offered at Summerlin Hospital where I’ll be delivering because it was twice as long and half as expensive. Mistake. I hated the class. We left halfway through. Maybe the problem was that I had a headache that morning, but I had no patience for the elderly nurse teaching the class. I’m a very “data driven” person, and this lady’s personal anecdotes weren’t cutting it for me when I wanted to know about the risks associated with epidurals. The childbirth videos we watched also made me feel very unsettled. Colby loved those, though. I’m not sure why they made me so uncomfortable. Maybe I’m still grossed out by the messiness of giving birth and the awkwardness of breast feeding. From now on I’ll be doing my own research to answer childbirth related questions.

Baby Shower

My boss and coworker threw me a baby shower! It was during week 34, so I was feeling very tired and swollen, but also very loved. It was so nice to see lots of women I care about show up to celebrate Everly’s upcoming arrival! Here are some photos from the shower:


Pregnancy Update: 30 weeks

I can’t believe our baby is due in just over two months! The second trimester of pregnancy went by so quickly. I’m now starting to get some back pain and swelling in my hands and feet, but having a few months of feeling great has been awesome. Our dogs love relaxing with me and taking rides on the baby bump.


Today’s pregnancy update is mainly about the nursery and baby registry!

Nursery

We haven’t made much progress on the nursery yet, but this is the look I’m most inspired by from Pinterest: 

I love how light and bright this room is! The botanical art prints are very pretty. The two pieces of furniture we have in the nursery so far are a white Hemnes dresser and white Sundvik crib from IKEA. Both are simple, sturdy, and inexpensive. I think they would be versatile choices for any nursery! 

Hemnes dresser- you can customize it with your own drawer pulls!

This is the Sundvik crib- it converts to a toddler bed and has great reviews on Consumer Reports. It’s made of solid pine- not bad for $99! 

The room we are using as the nursery is small- I don’t think a rocking chair or glider would fit in the space we have. We do have a linen colored Strandmon armchair from IKEA in the loft and I found a conversion kit online to turn the chair into a rocker. I haven’t purchased it yet because I have no idea if the baby will like being rocked or not. 

I don’t know how you’re supposed to pick things like bouncers, swings, gliders, and rockers for a baby registry when you don’t know what kind of motion your baby will like! Fortunately, my mom is awesome and found a great deal on a 4moms MamaRoo listed on Craig’s List in California! This fancy device has a bunch of different swinging and bouncing settings with variable speeds. Hopefully our little girl will like it! 


The only other thing we’ve done in the nursery so far is hang light colored blackout curtains with a sheer overlay. One of the windows is arched, so I wasn’t sure how it would look with regular curtains. It’s actually pretty nice, though! Kind of like this:


…but with curtains that look like this:


Registry

A lot of what I’ve put on our baby registry is nursery decor. I was torn between using amazon.com’s baby registry and Target’s. They both offer a completion discount, but neither option had everything I wanted to register for. I ended up creating private registries through Amazon and Target to be eligible for welcome gifts and completion discounts, but combined them into a public registry on Babylist. Babylist is AWESOME because you can register for any item that is sold online on any website! The site gives gift givers multiple purchasing options and you can include items from sites like Etsy, IKEA, Land of Nod, and even local businesses (doulas and maternity photographers included!). I love Babylist, but I still think the service could be made better. It would be fantastic if you could register for items simply by scanning a barcode with your phone and having the ability to automatically import items from other registries you’ve already created. If you’re interested in what I’ve registered for, you can check it out here. I did a lot of research before adding things. The most helpful advice I received about useful baby gear came from a registry consultant at Buy Buy Baby. If you’re considering doing a baby registry at a brick and mortar store rather than online, I highly recommend Buy Buy Baby because they have wonderful staff and a massive selection of baby things! 

Grilled Zucchini Naan Panini

I received free samples of Sabra Spreads mentioned in this post. By posting this recipe I am entering a recipe contest sponsored by Sabra and am eligible to win prizes associated with the contest. I was not compensated for my time.

I don’t like boring sandwiches. I pack my lunch to work most days, but I rarely ever pack sandwiches because they’re either too plain or too soggy. When I do eat a sandwich, it’s typically a grilled panini with flavorful toppings. Sabra has re-ignited my love of panini sandwiches with their flavorful new spreads!

dsc_0026

Sabra’s zesty spreads bring life to otherwise boring sandwiches. These healthy spreads will be my go-to sandwich topping in place of mayonnaise. They have 75% less fat and waaaay more flavor than plain ol’ mayo.

The flavorful blend of garlic, basil, chives, and oregano in the Garlic Herb Spread inspired me to create a dairy-free panini sandwich! If you happen to be lactose intolerant, you won’t even miss the cheese.

dsc_0021

Grilled Zucchini Naan Panini

  • Servings: 1
  • Difficulty: easy
  • Print

A zesty dairy free grilled sandwich with garlic herb hummus spread.

Ingredients

  • 1/2 zucchini, sliced lengthwise into 1/4″ thick strips
  • Olive oil
  • 1 large naan bread
  • 2 tablespoons Sabra Garlic Herb Spread
  • 1 roasted red bell pepper, cut into strips
  • 2 oz shredded cooked chicken

Directions

  1. Heat a grill pan over medium heat. Brush olive oil onto one side of zucchini strips. Place them oil side down on the hot grill pan and brush olive oil on the top side as well. Carefully flip after about 2 minutes, or when grill marks form. Grill for 2 more minutes and set aside.
  2. Cut the naan bread in half, place bumpy side down, and spread 1 tablespoon of Sabra Garlic Herb Spread on each flat half.
  3. Layer roasted red pepper strips, shredded chicken, and grilled zucchini on one of the naan bread halves. Top with the other naan bread half.
  4. Brush the grill pan with olive oil and carefully transfer the sandwich onto the grill pan for 2 minutes. Brush olive oil on top of the sandwich and carefully turn it over using tongs. Grill for 2 more minutes.
  5. Remove from the grill pan using tongs, cut in half, and serve immediately

My husband, who prefers a cheesy quesadilla for dinner most nights, agreed that this sandwich is delicious and he didn’t even miss the cheese! Of course, a little bit of crumbled feta on here would be heavenly. Have you tread the Sabra Spreads? What do you think?

Check out the posts in the Recipe ReDux linkup below for more sandwich inspiration!


Easy Tom Kha Soup

Don’t you hate it when you’re on the verge of being sick, so you take it easy, but then you keep on feeling like you’re coming down with something? I’ve been fighting off some kind of bug for nearly a week now. I’m glad it hasn’t turned into a full blown cold, but I’m ready to kick this thing! So today I made a shortcut version of my favorite Thai chicken soup- tom kha. My version is considerably “Westernized,” considering that I was missing a few key ingredients. The soup traditionally calls for kaffir lime leaves, stalks of lemongrass, and Thai chilis. I replaced kaffir lime leaves with a combination of lime zest and lime juice, bought Gourmet Garden fresh lemongrass, and replaced the Thai chilis with Gourmet Garden fresh chili.

dsc_0007

I hadn’t used these fresh herbs in a tube before, but I like them a lot! They stay fresh in the fridge for weeks. I think these will serve me well in making other Thai dishes in the upcoming weeks. I might pick up the garlic paste, too!

The fresh taste of ginger, lemongrass, and lime in this soup are well matched by the umami of fish sauce and spicy, salty broth. All the bold flavors are melded together with creamy coconut milk. Perfection.

dsc_0002

Tom Kha Soup

  • Servings: 4-6
  • Difficulty: easy
  • Print

A bold and vibrant Thai soup with lemongrass and coconut milk.

Ingredients

  • 6 cups low sodium chicken stock or broth
  • 1 tablespoon reduced sodium soy sauce
  • 2 teaspoons fish sauce
  • 1 teaspoon lemongrass paste
  • 1 teaspoon ginger paste
  • 1 teaspoon garlic paste
  • 1 teaspoon chili pepper paste
  • zest and juice of 1 lime
  • 2 cups diced vegetables, such as carrot, zucchini, onion, bok choy, etc. (optional)
  • 1 cup shiitake mushrooms, sliced
  • 1 lb chicken breast, cooked and shredded
  • one 13 oz can unsweetened coconut milk
  • salt & pepper to taste
  • Chopped fresh cilantro and green onion for garnish (optional)

Directions

  1. Bring the broth, soy sauce, fish sauce, lemongrass, ginger, garlic, chili, lime juice, and lime zest to a boil in a medium saucepan. Reduce to medium heat and simmer for 5 minutes.
  2. If using, add the vegetables and boil for another 5 minutes, until tender.
  3. Add the mushrooms and chicken breast. Bring back to a simmer for 5 more minutes.
  4. Add the coconut milk, whisk until combined and melted. Season with salt & pepper. Ladle into bowls and garnish with chopped cilantro and green onion.

Use this recipe as a general guideline rather than the ultimate, correct formula! If you really love some of the aromatic ingredients, feel free to add more and simmer a little longer to infuse the broth. Thai chilis and kaffir lime leaves are on my list of ingredients to buy soon! I can’t wait to make a more authentic version of this soup later this fall. Enjoy!

What’s your favorite Thai dish? 

Grown Up Macaroni and Cheese

This month’s Recipe Redux theme is “First Cooking Recollections.” I’m excited to share a little of my cooking background with you, especially now that I’m getting geared up to teach some basic cooking skills classes to my patients at work! I believe that kids are more likely to become interested and proficient in cooking healthy, delicious meals if they get started at a young age.

I’ve been cooking since I was four or five years old. Back then, my dad would pay me $5 to make him dinner. Dinner, in this case, was a couple of slices of Wonder bread topped with ketchup, shredded cheese, and pepperoni microwaved until hot and soggy for 60 seconds! I was so proud of myself.

When I was a little older, I learned to scramble eggs and cook quesadillas in a pan. When I was 12 or so, I started writing down my grandmother’s Polish recipes and learning some more sophisticated cooking techniques. She showed me how to tenderize chicken, chop vegetables without cutting my fingers off, and knead pierogi dough.

You’d think that by high school I must have been whipping up gourmet foods. In reality, I was too busy with school and IM-ing my friends to be bothered by cooking complex meals. I usually baked boxed cake mixes and enhanced cans of Spaghetti-O’s with cheese and tuna. To be honest, some of my favorite meals these days are the ones that take the least time and effort to prepare!

As a dietitian, I don’t feel great about eating a box of mac & cheese for dinner, but I can justify it if I add some protein and greens! My favorite combos lately have been sharp cheddar mac + broccoli + cherry tomatoes + chicken breast and the recipe I’m sharing with you today.

dsc_0003

Grown Up Mac & Cheese

  • Servings: 2
  • Difficulty: easy
  • Print

A healthier take on a childhood classic.

Ingredients

  • 1 box mac & cheese, such as Aunt Annie’s Aged Cheddar Macaroni & Cheese
  • 3 tablespoons low fat milk
  • 1 cup chopped frozen spinach, thawed
  • 4 oz cooked shredded chicken breast
  • 1/2 cup marinara sauce

Directions

  1. Prepare boxed macaroni and cheese according to package directions. Keep the macaroni with cheese sauce in the saucepan.
  2. Stir in the spinach, chicken, and marinara sauce.
  3. Heat and stir until all ingredients are hot and well combined.

dsc_0001

This week I’m teaching the kids some knife skills. We’re starting easy by cutting bananas, avocados, and zucchini using nylon chef’s knives. If you want to get your kids into cooking, here’s a great blog post with tips.  I love the idea of using a lettuce knife and Play Doh to start! This handbook from Cooking Matters gives some great insight for starting a hands on cooking program in your area! If you’re at a point where you’re still learning, Williams & Sonoma offers reasonably priced cooking classes for kids and adults. Recent topics covered were spiralizer recipes, Fall baking, barista basics, and Labor Day BBQ. Colby and I are taking a knife skills class these this weekend! I’ve heard is worth well over the $10 we’re paying to attend :)

The Recipe ReDux is the first and only recipe challenge founded by registered dietitians. The group is focused on taking delicious dishes, keeping them delicious, but making them better for you. 

Check out the link below to see how some of my fellow RDs and healthy foodies got their start in the kitchen!

DIY Instant Noodle Soup

By posting this recipe I am entering a recipe contest sponsored by Nestlé Health Science and am eligible to win prizes associated with the contest. As a participant in this contest, I also received a free trial sample of ProNourishTM, a low FODMAP nutritional drink developed by Nestlé Health Science. I was not compensated for my time.

Did you grow up loving instant ramen noodles as much as I did? They’re still a treat I crave when my throat is sore or the weather is gloomy. Today, I want to show you a grown up version of this convenient and comforting soup. It’s perfect for bringing to work- just add boiling water!

dsc_0012

This recipe is Low FODMAP. People diagnosed with irritable bowel syndrome, IBS, often benefit from following a low FODMAP diet. FODMAP is an acronym for Fermentable Oligosaccharides, Disaccharides, Monosaccharides And Polyols, which classifies specific types of short-chain carbohydrates that can trigger digestive distress in some people. Often times, anxiety causes these individuals to avoid all foods and food categories that give them discomfort — or fear will give them discomfort — which can unintentionally minimize their nutritional intake. After serious medical issues are ruled out, a registered dietitian nutritionist can help identify individual FODMAP triggers while minimizing food elimination and maximizing nutritional value.

You can watch an excellent video explaining the way FODMAP malabsorption can cause intestinal distress on the Monash University Website.

One of the most challenging foods to eliminate without sacrificing flavor are garlic and onions. It’s hard to imagine a delicious broth based soup without these ingredients! Most bullion cubes and concentrates contain garlic and/or onion powder. If these cause you GI distress, Savory Choice brand broth concentrates are a good option. The chicken, turkey, and beef broths are garlic and onion free. The trickiest part about developing a low FODMAP recipe is knowing which ingredients are “safe” to use. Monash University created an app with a very long and comprehensive list of foods to choose and those to avoid when you suffer from IBS.

After some brainstorming and checking low FODMAP food lists, it felt like an accomplishment to create a low FODMAP recipe that’s nutritious and doesn’t sacrifice flavor! I hope you enjoy it. As an added bonus, it’s totally portable and convenient  to pack for lunch. Just add boiling water :)

If you want to make your own variation of this soup, be sure to use ingredients that don’t need to cook for long. Vermicelli rice noodles are perfect for this, but you could substitute in other par-cooked gluten free grains. If you use hard vegetables, be sure to cut them very thin so they will soften with the boiling water.

dsc_0021

DIY Instant Noodle Soup

  • Servings: 1
  • Difficulty: easy
  • Print

An easy, low FODMAP lunch that's convenient and portable.


This recipe was developed using low FODMAP ingredients but the recipe itself has not been tested for its FODMAP content.

Ingredients

  • 2oz vermicelli rice noodles
  • 1 tablespoon onion & garlic free chicken broth concentrate
  • 1/4 teaspoon lemongrass paste
  • 1/4 teaspoon ginger paste
  • 2 oz cooked chopped chicken breast
  • 2 tablespoons sliced shiitake mushroom
  • 2 tablespoons grated carrot
  • 2 tablespoons chopped bell pepper
  • 2 tablespoons thinly sliced zucchini
  • 1 leaf of bok choy, thinly sliced
  • 1 tablespoon chopped cilantro

Directions

  1. Combine all ingredients in a pint sized or larger jar. Seal and refrigerate until ready to eat.
  2. Add boiling water, stir, cover, and allow to sit for 5 minutes.
  3. The soup is ready to eat once the noodles and vegetables are tender.

Check out these simple, nutritious ingredients. This soup will have you feeling fab without FODMAPs!dsc_0009

I’ll be packing it for work on the reg.

dsc_0016

I first became familiar with the low FODMAPs diet a few years ago when I was trying to figure out which foods were making me feel bloated and gassy. I hated feeling that way all the time. The clients I’ve worked with have experienced relief from their IBS symptoms by eliminating certain foods. If you suffer from GI symptoms, the Low FODMAP Central website is a great place to get started with next steps.

Check out more low FODMAP recipes through the link-up below:

Blackened Fish Tacos with Kiwi Mojito Salsa

I received free samples of Zespri SunGold Kiwifruit mentioned in this post. By posting this recipe I am entering a recipe contest sponsored by Zespri Kiwifruit and am eligible to win prizes associated with the contest. I was not compensated for my time.

The first thing I thought when I saw a kiwifruit without fuzzy skin and yellow flesh was, wow, this genetically engineered fruit is so cool, but will people be put off by the GMO’s? But then I was surprised to discover that Zespri SunGold kiwifruit is non-GMO! So how does it get its tropical flavor, high amount of vitamin C, and smooth skin? This surprising and delightful new fruit is a natural cross between gold varieties of kiwifruit. Kiwifruit actually comes in other colors, too, ranging from green to yellow and even pink on the inside!

You can find juicy yellow SunGolds at your local grocery store in North America from May-October.

Want to know some more cool facts about kiwifruit? Here you go!

1. You don’t peel it!

• Kiwifruit is the perfect portable snack because it is easy to eat! Just cut in half with a knife and scoop with a spoon. That’s it – just cut, scoop, and enjoy!

2. It’s a good, natural meat tenderizer!

• Both green and SunGold kiwifruit contain an enzyme called actinidin that helps break down protein. Actinidin occurs only in kiwifruit and improves digestive comfort by increasing the breakdown of proteins and facilitating digestion and emptying of the stomach. The actinidin can serve as a meat tenderizer: just peel and mash a kiwifruit and spread over meat or make a kiwifruit marinade. Actinidin will also break down protein in dairy so recipes with dairy should be consumed right away.

3. It’s a tasty source of vitamins C & E as well as potassium!

• One serving (2 kiwifruit) of SunGold provides three times more vitamin C than an orange and as much potassium as a medium banana. SunGold is a good source of antioxidant vitamin E.

4. You can “measure” the sweetness of kiwifruit!

• Zespri growers achieve the best-tasting kiwifruit through a measure called the brix. The higher the brix, the sweeter the fruit. The dry matter content (where all water is removed) indicates how high the brix will be once the fruit is ripe. A higher dry matter means the better quality the kiwifruit will be- it stores better and tastes better. Zespri kiwifruit is deliciously sweet, since the growers put a lot of emphasis on this measure.

There are many creative ways to use kiwifruit in cooking. You can marinate meat in it, put it in a cocktail, or make a refreshing summer ceviche. Here it is in a sweet and spicy take on fish tacos.

DSC_0006

Blackened Fish Tacos with Kiwi Mojito Salsa

  • Servings: 4
  • Print

A sweet and spicy take on fish tacos for hot summer nights.

Ingredients

  • 2 SunGold kiwifruit, halved, scooped out of skin, and diced
  • 1 jalapeño pepper, seeded and finely chopped
  • 2 tablespoons diced red cabbage
  • 1 tablespoon chopped fresh mint
  • 1 tablespoon chopped fresh cilantro
  • 2 tablespoons fresh lime juice
  • 2 tablespoons taco seasoning OR:
  • – 1 teaspoon paprika – 1 teaspoon brown sugar – 1 teaspoon dried oregano – 3/4 teaspoon garlic powder – 1/2 teaspoon chili powder – 1/2 teaspoon salt – 1/2 teaspoon ground cumin – 1/4 teaspoon ground cayenne pepper
  • 1 1/2 pounds tilapia filets
  • 1 tablespoon canola oil
  • 8 corn tortillas
  • Sriracha sauce, lime wedges, and/or sour cream for garnish

Directions

  1. In a medium bowl, toss together kiwifruit, jalapeño, cabbage, mint, cilantro, and lime juice. Set aside.
  2. If not using premade taco seasoning, combine the paprika, brown sugar, oregano, garlic, chili powder, salt, cumin, and cayenne in a small bowl to make your own. Sprinkle seasoning over the tilapia filets.
  3. Heat the canola oil in a large cast iron pan over high heat. Once very hot, cook the tilapia filets in it for about 3 minutes per side, or until blackened and cooked through. The fish should flake easily with a fork.
  4. Carefully heat the corn tortillas directly over the flame of a gas range to char them, or simply warm in an un-greased pan over medium-high heat.
  5. Divide the fish and salsa evenly among the tortillas. Garnish as desired and serve immediately.

DSC_0002

There’s nothing quite like summer eating, right? Let me know what you think of these tacos and be sure to check out culinary creations submitted by other Recipe ReDux members below:

Roasted Veggie Cutouts

I pulled out my cookie cutters for this fun project! I often work with families whose kids are picky eaters. When they are reluctant to try vegetables, a few tricks work wonders.

Color, shape, and texture make a huge difference! We eat with our eyes first, so bright colors with contrast work well. I superimposed two brightly colored vegetables by using a single cookie cutter. Simply slice two different firm vegetables or fruits of choice into 1/4″ thick medallions and use a small cookie cutter to punch out the same shape from both types of produce medallions. Next, swap their middles. The fun cutout shapes make the vegetables cuter and more fun to play with. Roasting the veggie medallions caramelizes their natural sugars and brings out a sweeter flavor. The texture becomes softer, but not mushy as it would from boiling.

Top it and dip it! Want to convince your picky eater to try a new vegetable? Try putting cheese on it! These medallions are topped with a broiled Italian cheese blend! Still not quite right? Make these taste like pizza by letting your kiddos dip them in pizza or pasta sauce! You could even get sneaky and puree some steamed veggies into the sauce.

DSC_0006

Roasted Veggie Cutouts

  • Servings: 4
  • Difficulty: easy
  • Print

A fun way to serve vegetables to picky eaters.

Ingredients


1 sweet potato
1 thick zucchini squash
cooking spray
salt & pepper
1/3 cup shredded cheese
1/3 cup pizza or spaghetti sauce (optional)

Directions

  1. Preheat oven to 425 degrees F. While the oven is preheating, slice the sweet potato and zucchini into 1/4″ thick medallions.
  2. Use a small (approx. 1.5″ diameter) cookie cutter to punch a shape out of every vegetable medallion.
  3. Spray an aluminum foil lined cookie sheet with cooking spray. Arrange the medallions on the cookie sheet, leaving about 1/2″ of space between medallions. Swap the centers of the vegetable cutouts to create contrast.
  4. Bake for 10 minutes at 425 degrees F. Flip each medallion combo over using a spatula and bake for 5-10 minutes more, or until golden and tender.
  5. Top each medallion with a sprinkle of shredded cheese. Broil briefly, just until melted and bubbly. Allow to cool slightly and serve with pizza sauce, if desired.

DSC_0009

Check out these other fun fruit and vegetable shapes in this month’s Recipe ReDux!


Dressing an Athletic Body Shape

I received a credit to try Stitch Fix as a result of this promotion. By posting this review I am entering a contest sponsored by Stitch Fix and am eligible to win a prize. I was not compensated for my time. This post contains affiliate links.

Typically the Recipe ReDux has us share meal ideas, but this month we had the opportunity to team up with StitchFix to try their personal stylist service! I had been itching to go shopping for some new summer and office clothes, so this was the perfect opportunity to get inspired.

If you’ve been considering StitchFix, you can use this link to fill out a style quiz and pick a day to receive your first five custom selected pieces:


Shopping is always a long and exhausting process for me. I like to find good deals and I want my clothes to fit me really well. Dressing my body shape, which is a combination of short, curvy, and athletic is a challenge. I usually turn to Pinterest or fashion blogs for advice.

While I’ve found plenty of workout clothing suggestions for “athletic figures” this way, my closet is already full with a disproportionate number of activewear pieces. It’s been tough to find good articles on what clothes look best on athletically curvy women, so here’s what I have to say about it!

Tops:

(Piece #1 is this sleeveless shirt) Show off toned arms with sleeveless styles. This gorgeous coral tank top is made of lightweight fabric that flows in the breeze. The color makes skin tone look golden and sun kissed. The v-neck notch is also a plus because it elongates the look of your neck and torso!

DSC_0010

This bright color looks wonderful with white jeans! The only thing I would change is its length- it would look better if it were about 2 inches longer and hit right at the fullest part of round hips.

DSC_0122

(Piece #2 is this yellow blouse) I typically don’t like cap sleeves on muscular shoulders. They seem to make shoulders look even broader, but this unique cap sleeve cut on delicate fabric is actually quite flattering and slimming. The canary-yellow color is irresistible, too.

DSC_0019

You can see from the side that this is a very unique and pretty style!

DSC_0030

I liked pairing this top with a navy blue pencil skirt. The loose fitting top looks nice with a darker colored, form fitted skirt or pants. Tucking it in accentuates a narrow waist.

DSC_0117

(Piece #4 is this grey blazer) I love the look of slim fitted cardigans and blazers over a tank top or sleeveless blouse. This stretchy grey and black blazer is incredibly soft, clings to your arms to make them look shapely, and hugs your back and shoulders to flatter your figure.

DSC_0010

Bottoms:

You may have noticed in the photos above that I’m partial to form fitted, dark colors for an athletically curvy bottom half. Denim that has at least 1% lycra or some stretch to it is best. Choose bootcut or flared pants to balance wider hips and thicker thighs, but don’t be afraid to rock a skinny jean as long as it’s made from a heavier fabric that won’t bunch up in weird places!

(Piece #4 are these distressed denim capris) These distressed capris were promising, but they were a little too tight on my thighs and didn’t fit well in the back. #bootyproblems. What I liked about them is that they were a low rise that looks great with a floral crop top. The dark wash is nice, too, but a capri length can be challenging to pull off successfully with muscular calves and solid ankles. Nude or gold colored wedges help to elongate the legs for this look.

DSC_0131

Here’s a close up of the fun distressed patches and the indigo wash of these jeans!

DSC_0014

(Piece #5 are these stretchy blue work pants) Trousers are one of the biggest challenges I have in my wardrobe. Stiff trouser fabrics don’t flow right with curvy hips and thin pants with no stretch completely hide the attractive curve of shapely legs, making them look like two stumps. These trousers were simply awesome! The bootcut style is slimming and the fabric is both stretchy AND thick, which looks fantastic on an athletic body.

DSC_0018

These are as comfortable as yoga pants! There’s no need for a belt, which means the top of these trousers lay flush with your skin even under slim fit tops. No zipper is also a plus– there’s no bunching up in the crotch! Here’s the same pair of pants with that pretty coral top from the first photo.

DSC_0016

Photographing clothes instead of food has been a fun, new challenge! The self timer and basic tripod helped me accomplish most of these photos, but having someone to assist has been invaluable. Colby took the close up shots to show more details in fit and design. Would you be interested in hearing more tips I come across for dressing an athletic body shape? Let me know in the comments!

If you have a friend who would love to try StitchFix, you can purchase a gift card here:


Be sure to check out the other ReDux members’ StitchFix finds in the linkup below!