Grown Up Macaroni and Cheese

This month’s Recipe Redux theme is “First Cooking Recollections.” I’m excited to share a little of my cooking background with you, especially now that I’m getting geared up to teach some basic cooking skills classes to my patients at work! I believe that kids are more likely to become interested and proficient in cooking healthy, delicious meals if they get started at a young age.

I’ve been cooking since I was four or five years old. Back then, my dad would pay me $5 to make him dinner. Dinner, in this case, was a couple of slices of Wonder bread topped with ketchup, shredded cheese, and pepperoni microwaved until hot and soggy for 60 seconds! I was so proud of myself.

When I was a little older, I learned to scramble eggs and cook quesadillas in a pan. When I was 12 or so, I started writing down my grandmother’s Polish recipes and learning some more sophisticated cooking techniques. She showed me how to tenderize chicken, chop vegetables without cutting my fingers off, and knead pierogi dough.

You’d think that by high school I must have been whipping up gourmet foods. In reality, I was too busy with school and IM-ing my friends to be bothered by cooking complex meals. I usually baked boxed cake mixes and enhanced cans of Spaghetti-O’s with cheese and tuna. To be honest, some of my favorite meals these days are the ones that take the least time and effort to prepare!

As a dietitian, I don’t feel great about eating a box of mac & cheese for dinner, but I can justify it if I add some protein and greens! My favorite combos lately have been sharp cheddar mac + broccoli + cherry tomatoes + chicken breast and the recipe I’m sharing with you today.

dsc_0003

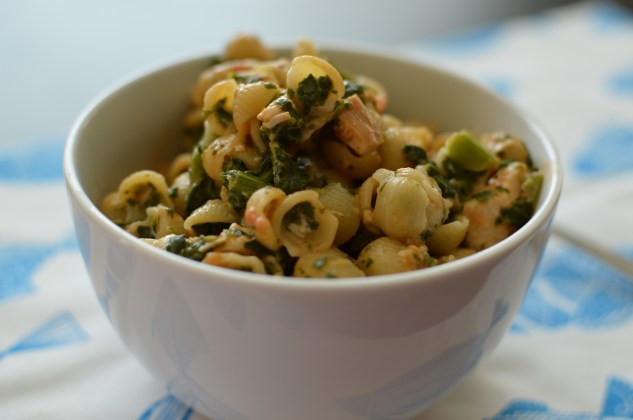
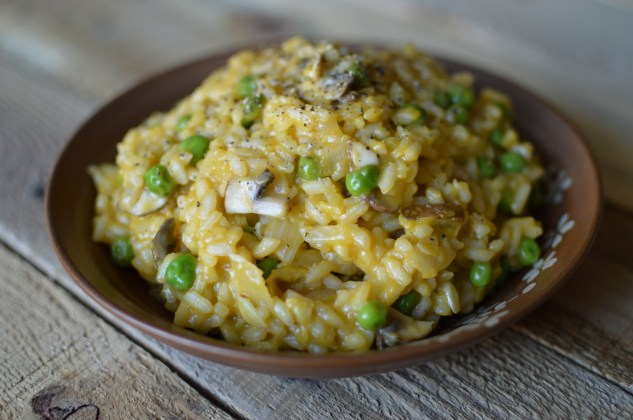
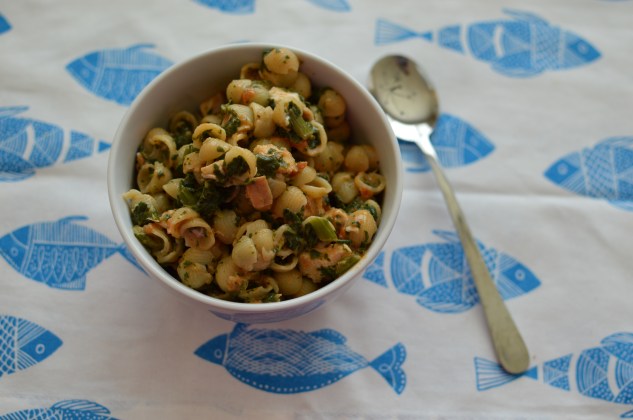
Grown Up Mac & Cheese

  • Servings: 2
  • Difficulty: easy
  • Print

A healthier take on a childhood classic.

Ingredients

  • 1 box mac & cheese, such as Aunt Annie’s Aged Cheddar Macaroni & Cheese
  • 3 tablespoons low fat milk
  • 1 cup chopped frozen spinach, thawed
  • 4 oz cooked shredded chicken breast
  • 1/2 cup marinara sauce

Directions

  1. Prepare boxed macaroni and cheese according to package directions. Keep the macaroni with cheese sauce in the saucepan.
  2. Stir in the spinach, chicken, and marinara sauce.
  3. Heat and stir until all ingredients are hot and well combined.

dsc_0001

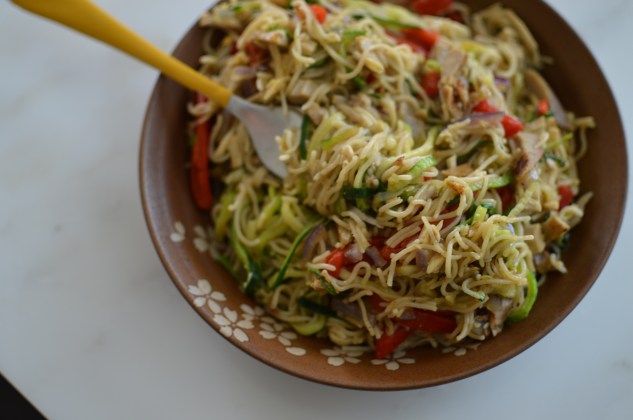
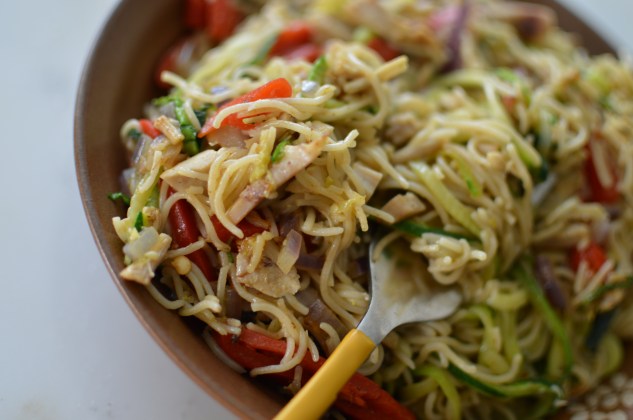
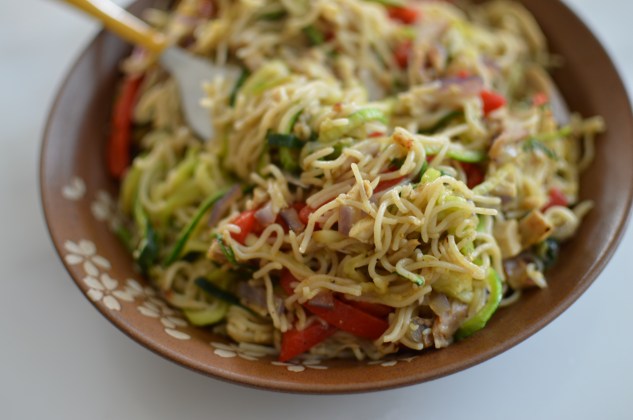
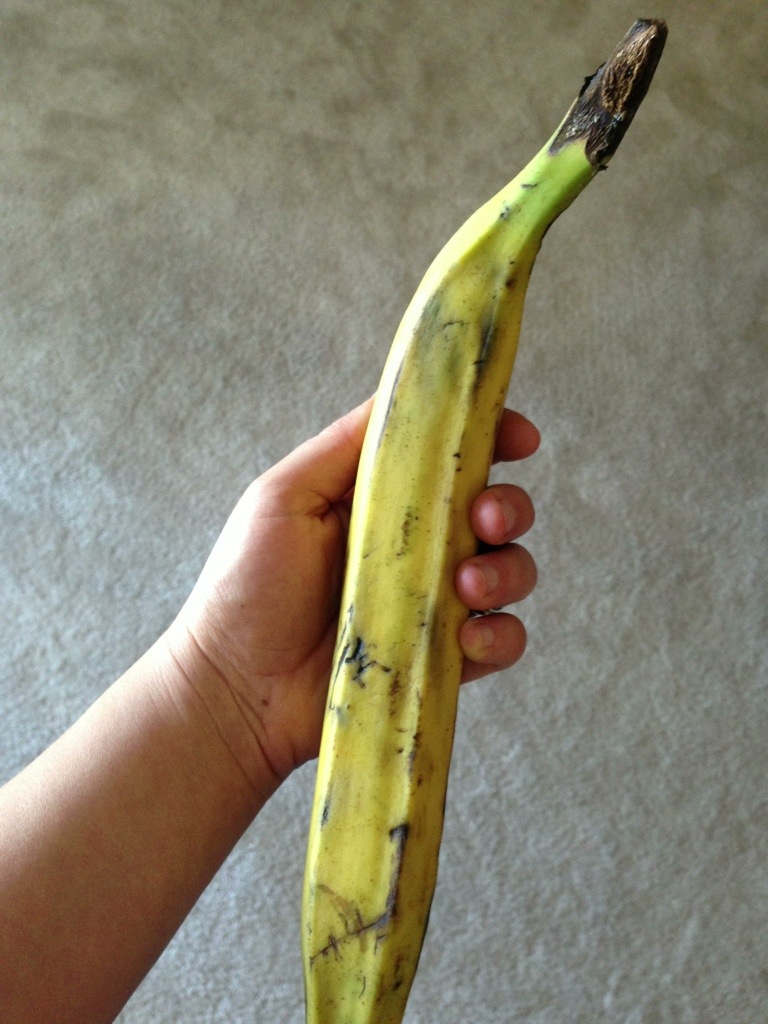
This week I’m teaching the kids some knife skills. We’re starting easy by cutting bananas, avocados, and zucchini using nylon chef’s knives. If you want to get your kids into cooking, here’s a great blog post with tips.  I love the idea of using a lettuce knife and Play Doh to start! This handbook from Cooking Matters gives some great insight for starting a hands on cooking program in your area! If you’re at a point where you’re still learning, Williams & Sonoma offers reasonably priced cooking classes for kids and adults. Recent topics covered were spiralizer recipes, Fall baking, barista basics, and Labor Day BBQ. Colby and I are taking a knife skills class these this weekend! I’ve heard is worth well over the $10 we’re paying to attend :)

The Recipe ReDux is the first and only recipe challenge founded by registered dietitians. The group is focused on taking delicious dishes, keeping them delicious, but making them better for you. 

Check out the link below to see how some of my fellow RDs and healthy foodies got their start in the kitchen!

Easy Zucchini Noodle Ramen Pasta

Thanks, Recipe ReDux, for reminding me that it’s tax season and I have yet to file our return! The past few weeks have been crazy busy, so this month’s ReDux theme of “seven ingredients or less” is much appreciated. You too can have dinner ready in under 10 minutes with this breeze of a meal!

IMG_0548

Ingredients:

(serves 1)

1 block of brown rice ramen noodles (found them at Costco)

1 teaspoon olive oil

1/4 cup red onion, sliced

3 oz cooked chicken breast, shredded

1  jarred roasted red pepper, sliced into thin strips

1 teaspoon chicken bullion paste

1 large zucchini, cut into long strands

Preparation:

  1. Cook the ramen noodles according to package instructions, boiling for about 4 minutes in a small saucepan.
  2. While the noodles cook, heat the olive oil in a skillet. Sauté the red onion, chicken, and red pepper for 2 minutes.
  3. Stir in the bullion paste, hot drained ramen noodles, and zucchini strands. Serve immediately.

IMG_0546

This dish is fast, nutritious, and tastes like a guilty pleasure! By bulking up the ramen with zucchini noodles you can enjoy a heaping bowl of comfort food and feel great about your decision.

450 calories/ 59 grams carb/ 9 grams fat/ 31 grams protein/ 7 grams fiber

IMG_0547


Creamy Vegan Risotto

I received free samples of Progresso Cooking Stock mentioned in this post at no cost. By posting this recipe I am entering a recipe contest sponsored by Progresso Cooking Stock and am eligible to win prizes associated with the contest. I was not compensated for my time.

Risotto has always been an intimidating dish to me. I always assumed it takes a lot of culinary skill to make it properly. In fact, my first attempt at making risotto in the oven failed miserably. Fortunately, my sister is a chef and she took the time to show me the right way to make it. Turns out it’s not very difficult or time consuming! The most important thing is to pay attention to the rice to keep it from getting overcooked and gluey.

Agata taught me to make a very creamy risotto with parmesan and mascarpone. It was incredibly delicious!! For this Recipe Redux challenge, I decided to make a risotto that is just as creamy without the addition of cheese. I’m so excited to show you that it’s possible to make a flavorful, creamy risotto dish that is completely vegan! Thanks to Progresso’s Vegetable Cooking Stock, you get depth of savory flavor without animal products. The #ProgressoEatsContest gave me the opportunity to experiment a bit.

In case you didn’t know that Progresso launched a line of tasty cooking stocks, here are some details about the products:

  • Now available in grocery stores nationwide in the soup aisle, Progresso premium Cooking Stocks are made by simmering real bones, vegetables and herbs to create a flavor that’s close to homemade.
  • Due to the process Progresso’s chefs use to simmer the real bones, Progresso Cooking Stocks have rich, meaty flavor and are full of body, making them ideal for adding deep, complex flavor to many dishes including soups, stews, sauces and gravies.
  • Made without artificial flavors and with just 15-45 calories /95-420mg sodium /0-1g fat per serving, Progresso Stocks offers a clean way to boost your flavor game.

I used the chicken stock to make a delicious soup, but was even more impressed with the depth of flavor imparted by the hearty vegetable stock. It really shines through in this recipe!

IMG_0455

Ingredients:

(Serves 3-4)

2 tablespoons olive oil

1/2 cup diced yellow onion

1 clove minced garlic

3/4 cup arborio rice

1/3 cup dry white wine

3 cups simmering Progresso Vegetable Cooking Stock

1/2 cup diced mushrooms

1/2 cup frozen peas

salt and freshly ground pepper

Preparation:

  1. Heat olive oil in a medium nonstick saucepan over medium-high heat. Add the diced onion and stir constantly until softened and translucent, about 3 minutes.
  2. Add the minced garlic and arborio rice to the saucepan. Stir constantly to coat with olive oil and toast, another 3 minutes.
  3. Add the white wine and stir until the liquid is absorbed and some of the alcohol has cooked off, another 2-3 minutes.
  4. Add enough vegetable stock to just cover the rice. Stir constantly until most of the liquid is absorbed. Add another 1/2 cup of stock to the rice. Repeat this process of adding the stock gradually and stirring frequently until the rice is cooked al dente. Do not overcook! The process of adding the stock 1/2 cup at a time should take about 15-20 minutes over medium-high heat.
  5. Fold in mushrooms and frozen peas. Stir for about 2 minutes until the vegetables are heated through. Season to taste with salt and freshly ground pepper.

The whole process takes less than 45 minutes and is well worth the effort! This risotto is creamy like mac n’ cheese and maintains a nice texture from the al dente cooked rice and pop of the green peas. Enjoy!

IMG_0459

20 Minute Thai Soba Noodles

Forget macaroni & cheese, this noodle dish tastes better than take-out and I bet you’ll be able to make it in 15 minutes after a few tries! I’ve always been intimidated by the idea of cooking Thai food at home. I assumed it would involve tons of exotic ingredients that might end up collecting dust in my pantry for months. After browsing some pad Thai recipes online, I realized it doesn’t have to be all that complicated. You probably already have sriracha sauce, soy sauce, and peanut butter around, right? So you don’t need much more! Here are the other staples you’ll want to keep around for Asian cooking:

  • Fish sauce – This is a simple sauce of fermented anchovies, water, and salt. The flavor isn’t fishy when you add a tiny bit to food. Instead, it imparts a savory depth of flavor that will blow your mind! There’s a great article on Serious Eats about ways to harness the umami flavor in all kinds of world cuisine.
  • Fresh ginger – Makes everything taste fresh! Buy some ginger root, chop it up, and store in your freezer if you’re not going to use it frequently.
  • Soba noodles – These are Japanese noodles made with high protein buckwheat flour, which means they boast 8 grams protein per 2 oz serving. Best of all? They cook in FOUR minutes! (Yeah, I know I’m mixing Thai and Japanese cuisine with today’s recipe, but it works!)
  • Sambal olek- Chili paste. It’s like a thicker, chunky version of sriracha sauce. I’ve used it in my African pork tenderloin recipe here

Ready for an easy starter Thai recipe?? Here you go!

  
Ingredients:

(serves 1-2 people, depending on appetite)

3.1 oz bundle of dry soba noodles

1 tablespoon creamy peanut butter

1 tablespoon reduced sodium soy sauce

1 tablespoon water

1 teaspoon sambal olek (chili paste), or sriracha sauce

1/2 teaspoon fish sauce (optional)

2 tablespoons canola oil

1 teaspoon minced ginger

1 teaspoon minced garlic

1/2 cup julienned vegetables of choice (ie carrots or zucchini cut into little matchstick sized pieces)

 1 teaspoon apple cider vinegar

1 teaspoon brown sugar

3 oz shredded rotisserie chicken or cooked shrimp (optional)

Lime wedge, green onion, bean shoots, chopped nuts, and/or sriracha sauce for garnish

Preparation:

1. Bring a medium pot of water to a boil and chop all your vegetables. Prepare your sauce in a small bowl by whisking together peanut butter, soy sauce, water, chili paste, and fish sauce. Set aside.

2. Add soba noodles to the boiling water and cook for 4 minutes while completing the remaining steps.

3. Heat canola oil in a 10″ skillet. Add the garlic and ginger and sauté for 1 minute.

4. Add the julienned vegetables to the oil, ginger, and garlic. Sauté for an additional 2 minutes. 

5. Drain the soba noodles and toss into the skillet. Add apple cider vinegar, brown sugar, and sauce. Stir to coat. Add chicken or shrimp at this point, if using.

6. Serve hot and garnish as you wish. I like my noodles with a squeeze of lime, some chopped green onion, sriracha, and sliced almonds!

  
Seriously, don’t be intimidated by the longer ingredients list here! This dish is fantastic and super quick to make. It’s not a traditional “pad thai” dish, though. If you’re looking for something more authentic, head over to my friend Laura’s new blog, www.earth2laura.com, where she shares recipes for world cuisine. Today she is featuring a legit pad thai recipe

Green Lentil Quinoa Pilaf

On this overcast day, I decided to make a satisfying vegetarian lunch bowl. The following recipe can be served solo or as a tasty and protein packed vegetarian side dish! The chewy quinoa and lentils have a wonderful texture, while the tomato, garlic, and cumin bring the dish to life with a big burst of flavor.

20130907-154211.jpg

Ingredients:
1/2 c dry green lentils
1/2 c dry quinoa
2 c vegetable broth
1 tbs olive oil
1 tsp garlic powder
1/4 tsp tarragon
1/2 tsp cumin
1/2 tsp salt
1 tbs minced onion
1 c tomato sauce

1. Being quinoa, lentils, and vegetable broth to a boil.

2. Add olive oil and seasonings (everything except tomato sauce). Reduce heat and simmer for 15-20 minutes until all liquid is absorbed.

3. Stir in tomato sauce and adjust seasonings to taste. Serve warm or chilled.

20130907-154727.jpg

Salmon, Quinoa, and Veggies in 20 Minutes

Try this meal when you only have 20 minutes to get a balanced dinner on the table! Salmon cooks quickly in the oven, quinoa is a breeze to prepare on the stovetop, and veggies are sautéed to perfection in under 10 minutes. Here we go!

20130905-130659.jpg

Ingredients:
2 marinated salmon filets, 6 oz each
1/2 cup quinoa
1/2 cup chicken broth
1/2 cup water
1 tsp + 1 tbs olive oil
2 tsp minced garlic, divided
1 green bell pepper, sliced
1/2 onion, sliced
2/3 cup grape tomatoes

1. Place 2 salmon filets on an aluminum foil lined baking sheet. Bake at 400 degrees for 15-20 minutes until fork tender. (I used Costco’s wild Alaskan marinated salmon)

2. While the salmon is in the oven, heat dry quinoa in a saucepan until hot and fragrant. Add water, chicken broth, 1 tsp olive oil, and 1 tsp minced garlic. Bring to a boil. Reduce to simmer, cover, and cook for 15 minutes.

3. Once the quinoa is cooking, slice the veggies. Heat 1 tbs olive oil in a skillet. Add the onion and bell pepper. Move around the pan for a few minutes until golden. Add a splash of water if the pan is getting dry. Add the grape tomatoes and 1 tsp minced garlic to the pan and continue to sauté for a couple minutes longer. Season to taste with salt and pepper.

4. The salmon and quinoa should be done shortly after the veggies are finished. Split everything between 2 plates and serve!

20130905-131636.jpg

Sweet Potato Curly Fries

Remember the awesome Spiralizer I used to make zucchini noodles? It has a different blade you can use to make curly fries! I decided to try it out on sweet potato. Here’s a great recipe you can use to get crispy oven fried sweet potato fries instead of mushy or burnt ones.

20130726-124254.jpg

Ingredients:
1 large sweet potato, scrubbed
2 tbs canola or olive oil
Seasonings (about 1/2 tsp salt, 1/4 tsp cayenne pepper, and 1/2 tsp garlic powder)

1. Preheat oven to 450 degrees. Spiralize the sweet potato or cut into uniform slender wedges.

2. In a large ziplock bag, toss the sweet potato pieces with oil and seasonings to coat well.

3. Spread the fries in a single layer on a large baking sheet lined with aluminum foil. Keep them as spread out as possible, or else they may steam instead of baking which will result in mushy fries.

4. Bake in the top rack of the oven (any lower and the fries may burn) for 20-25 minutes, flipping once.

20130726-125157.jpg

Tostones and Mofongo recipe: gluten free fun with plantains

I went out for dinner and drinks with my coworkers last Friday night at Bar + Bistro, one of my favorite tapas restaurants in Vegas. My favorite tapas were the tostones- little sandwiches made on fried plantains instead of bread!

20130719-123641.jpg

These were SO delicious!! I couldn’t wait to recreate them at home. I’ve never used plantains before, so I did some research first.

-tostones are a dish that comes from Puerto Rico. They are eaten as a side dish in place of rice, pasta, or bread.

-plantains are starchier and less sweet than bananas, so they can be eaten savory or sweet. They also have more potassium than bananas!

Tostones are quick and easy to make. I found plantains at Whole Foods for $1 per pound. You can get an even better deal at Hispanic supermarkets. Pick a plantain that is green. I didn’t know any better, so I got a yellow one with some dark spots. It was still good, but a little on the sweeter side.

20130719-124149.jpg

Ingredients:
-1 plantain, large
-2-3 tbs grapeseed, coconut, or canola oil
-salt to taste

1. Cut the plantain into 1.5 inch slices. Heat the oil in a skillet on medium-high heat.

2. Fry the plantain slices until golden on all sides, but not burnt. Adjust the flame as necessary.

3. Stand the plantain slices on a paper towel and gently flatten each one with the bottom of a plate or mug until they are about 1/4 – 1/2 inch thick.

4. Return the plantain patties to the skillet and fry until golden on both sides. Return to paper towel to remove excess oil. Season with salt to taste.

I served my tostones with leftover slices of African roasted pork and mint sauce. They would be really good with roast beef, carnitas, or turkey breast as well!

20130719-124934.jpg

My tostones were not as crispy as the restaurant version because I used less oil, but they were still very tasty!

For a different variation called mofongo, simply mash the fried plantains with a bit of garlic at the end. This is a very tasty alternative to mashed potatoes!

Gluten free sweet potato gnocchi

Sometimes the inspiration for a dish comes from a single ingredient. In this case, I was dreaming up unique ways to use sweet potatoes. These gnocchi are a flavorful variation of the traditional potato dumplings. The addition of ricotta cheese and parmesan gives them a little extra bite and chew. The brown butter sage sauce makes these babies out-of-this-world delicious!

20130712-061557.jpg

Ingredients:
1 large or 2 small sweet potatoes
6 oz ricotta cheese (fat free ricotta worked fine)
1 egg
1/2 c grated parmesan
1 tsp salt (plus more for salting the water)
1/2 tsp cinnamon or nutmeg
1 cup brown or white rice flour (more for dusting)
1/2 cup sweet rice flour (gives a better consistency- or try potato starch in place of this)
1/2 stick butter
1/4 c fresh sage, chopped

1. Pierce sweet potatoes with a fork and microwave until tender, about 5 minutes. Cut in half to cool and scoop out the insides with a spoon. Press through a potato ricer or food processor and place in a large bowl.

2. Add ricotta, parmesan, cinnamon/nutmeg, salt, and egg to the potatoes. Mix to combine.

3. Add the flour and mix the dough until smooth. If the dough is still very sticky, add a bit more flour. Boil a large pot of salted water.

4. Separate the dough into 2 balls. On a floured surface, roll one of the balls out into a log about 1/2″ diameter. Cut at 3/4″ intervals with a knife.

20130712-114731.jpg

5. Roll each piece into a small egg shape and smash slightly between your fingers.

20130712-114909.jpg

6. Gently boil the first batch of gnocchi for about 3-5 minutes, or until they float up to the surface. Set aside and repeat steps 4-6 with the other half of the dough.

7. Heat butter in a skillet until bubbly. Add chopped sage. Sauté the gnocchi in the sauce in two batches until golden. Serve seasoned with salt, pepper, remaining sauce, and shredded parmesan.

20130712-123129.jpg