Cheddar Beer Nachos

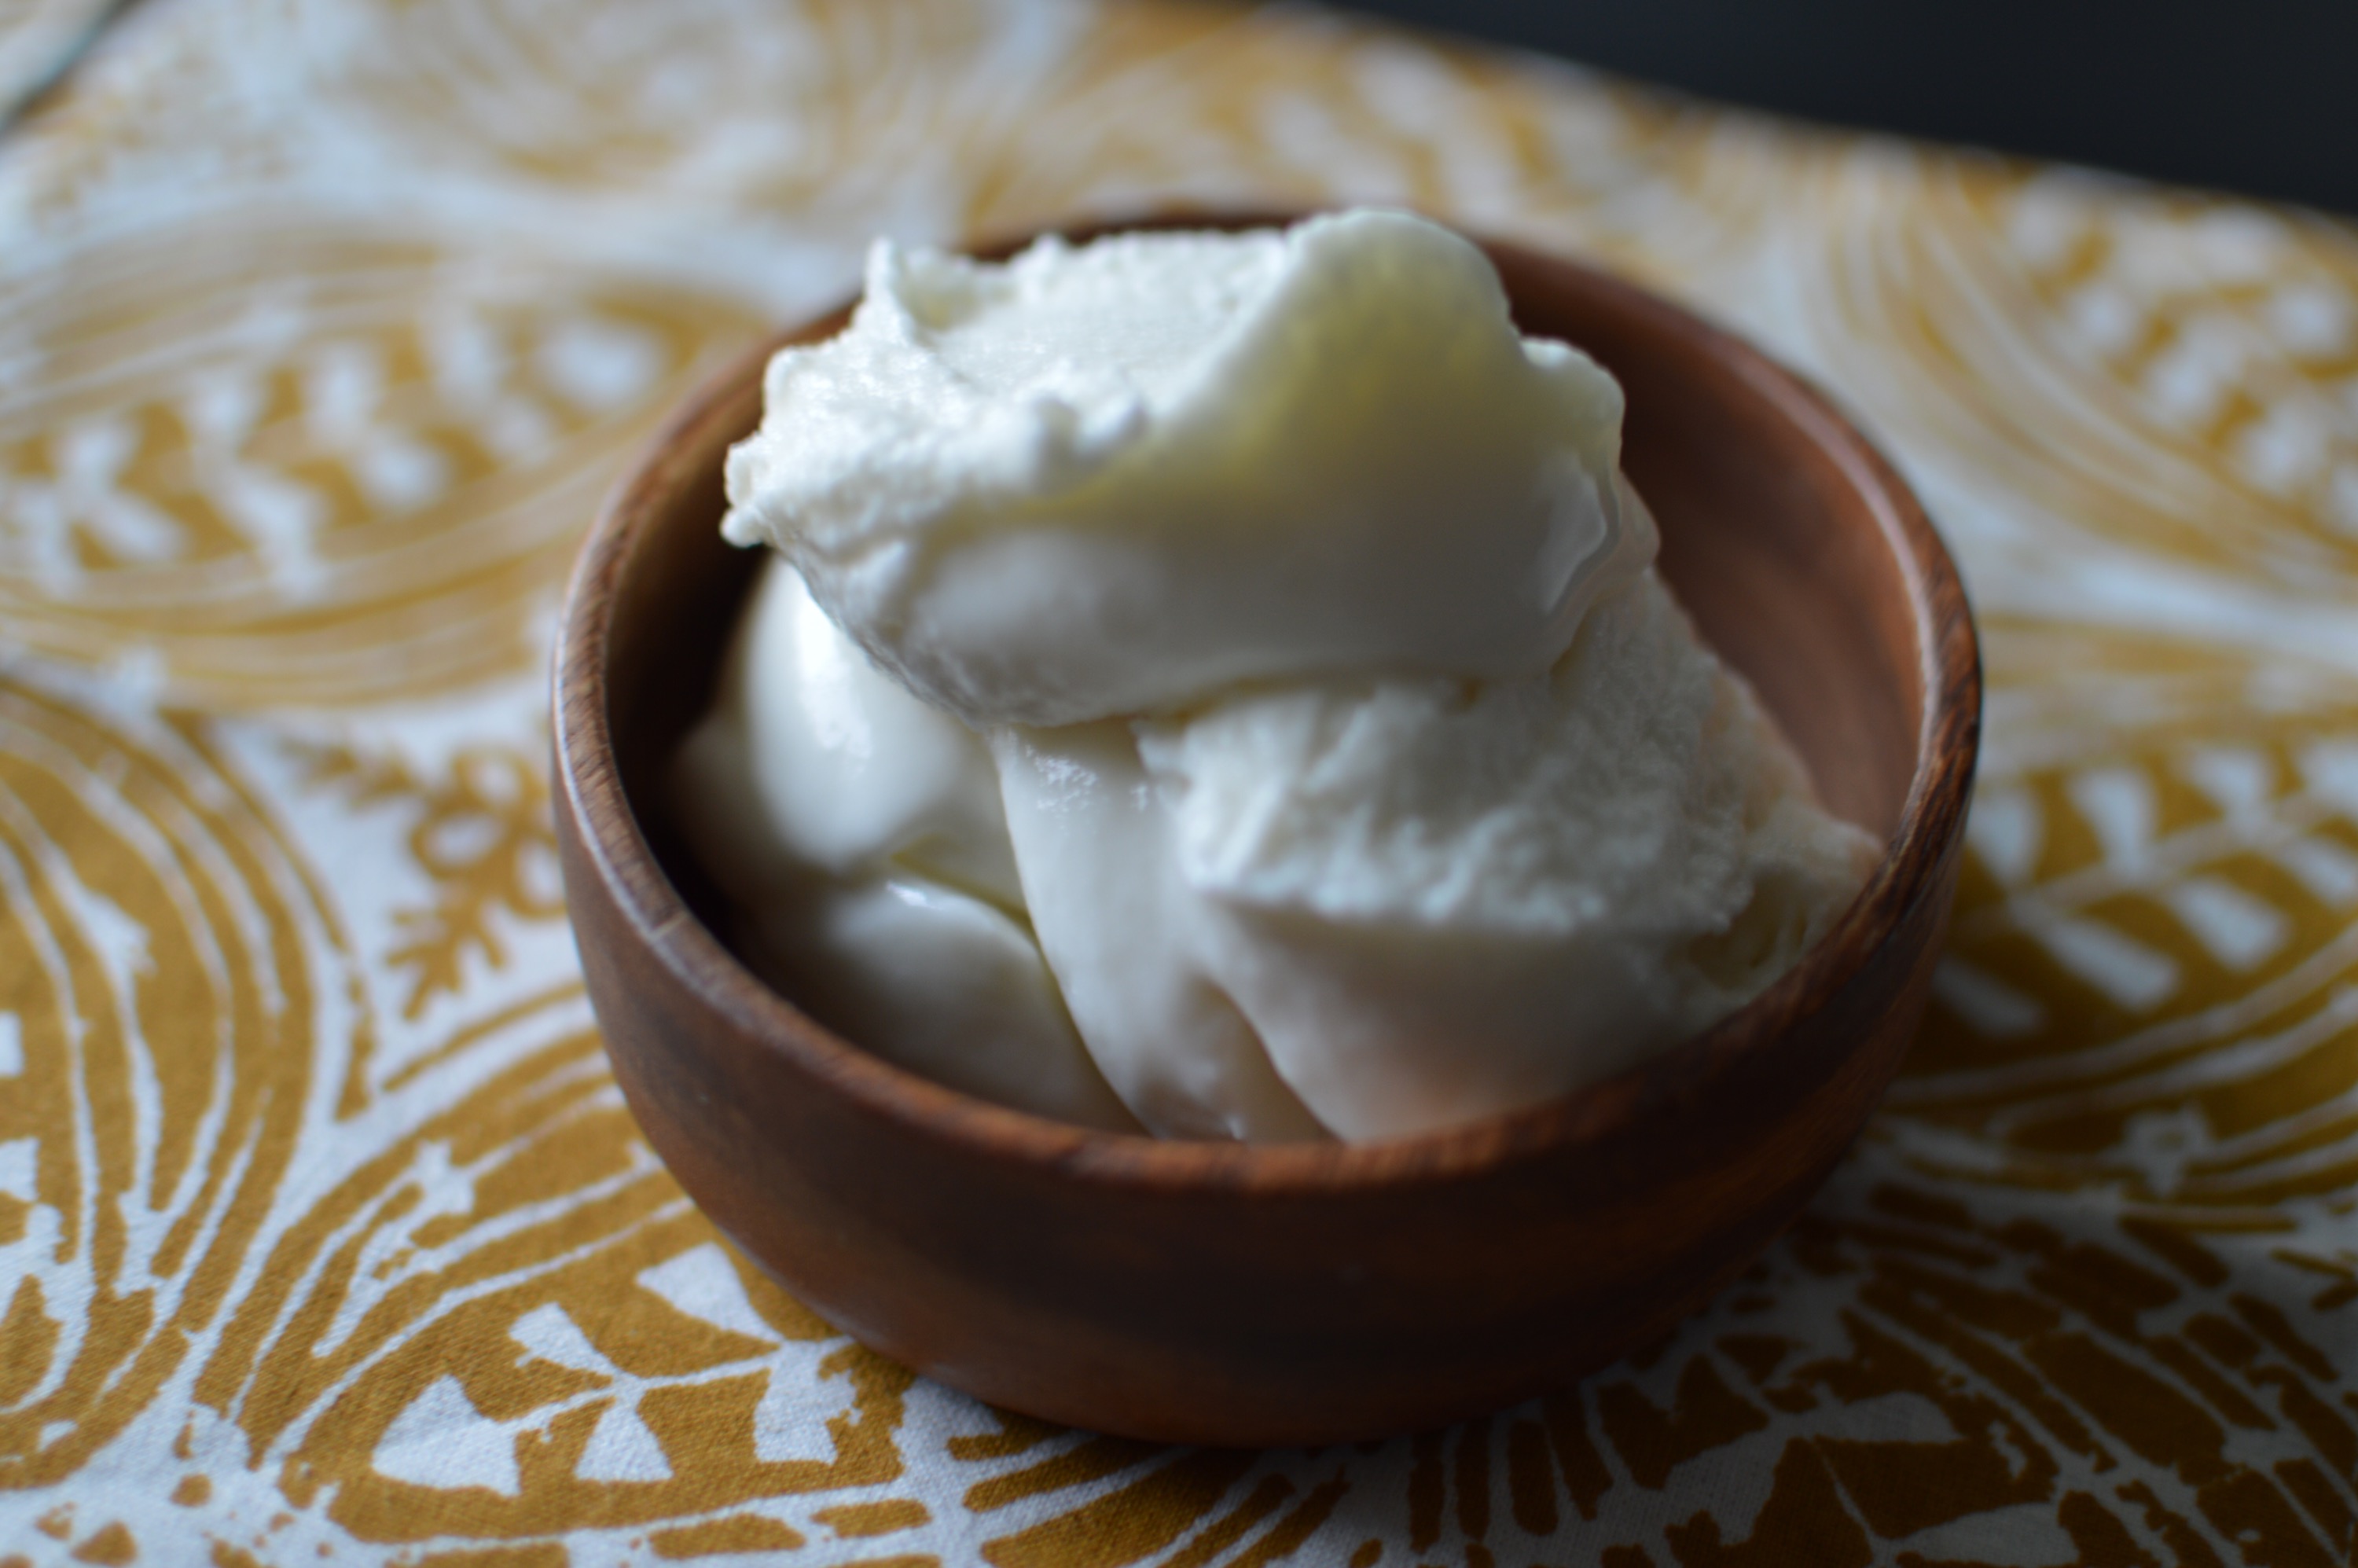
Ready for the big game this weekend? While I’m not a huge football fan, I love watching the expensive commercials and snacking during the game. Thanks to the generosity of Cabot Creamery, I had several varieties of cheddar to play with for this crowd pleasing recipe. It’s a lightened up nacho recipe to serve at your next get together! It uses baked tortilla chips, which are 40% lower in fat than the regular restaurant kind, but this recipe doesn’t skimp on flavor! The combination of extra sharp cheddar with IPA and smoky ham more than makes up for the healthier corn chips. Using extra sharp cheddar in recipes is smart because it’s so tangy and cheesy that you can use less of it than you would a milder cheese and still get amazing depth of flavor. Cheddar cheese pairs well with hoppy IPA- the beer I chose for my cheese sauce! Bonus: you only use 1/2 a cup of the beer, so you can sip on the rest while you cook!
IPA Cheddar Nachos

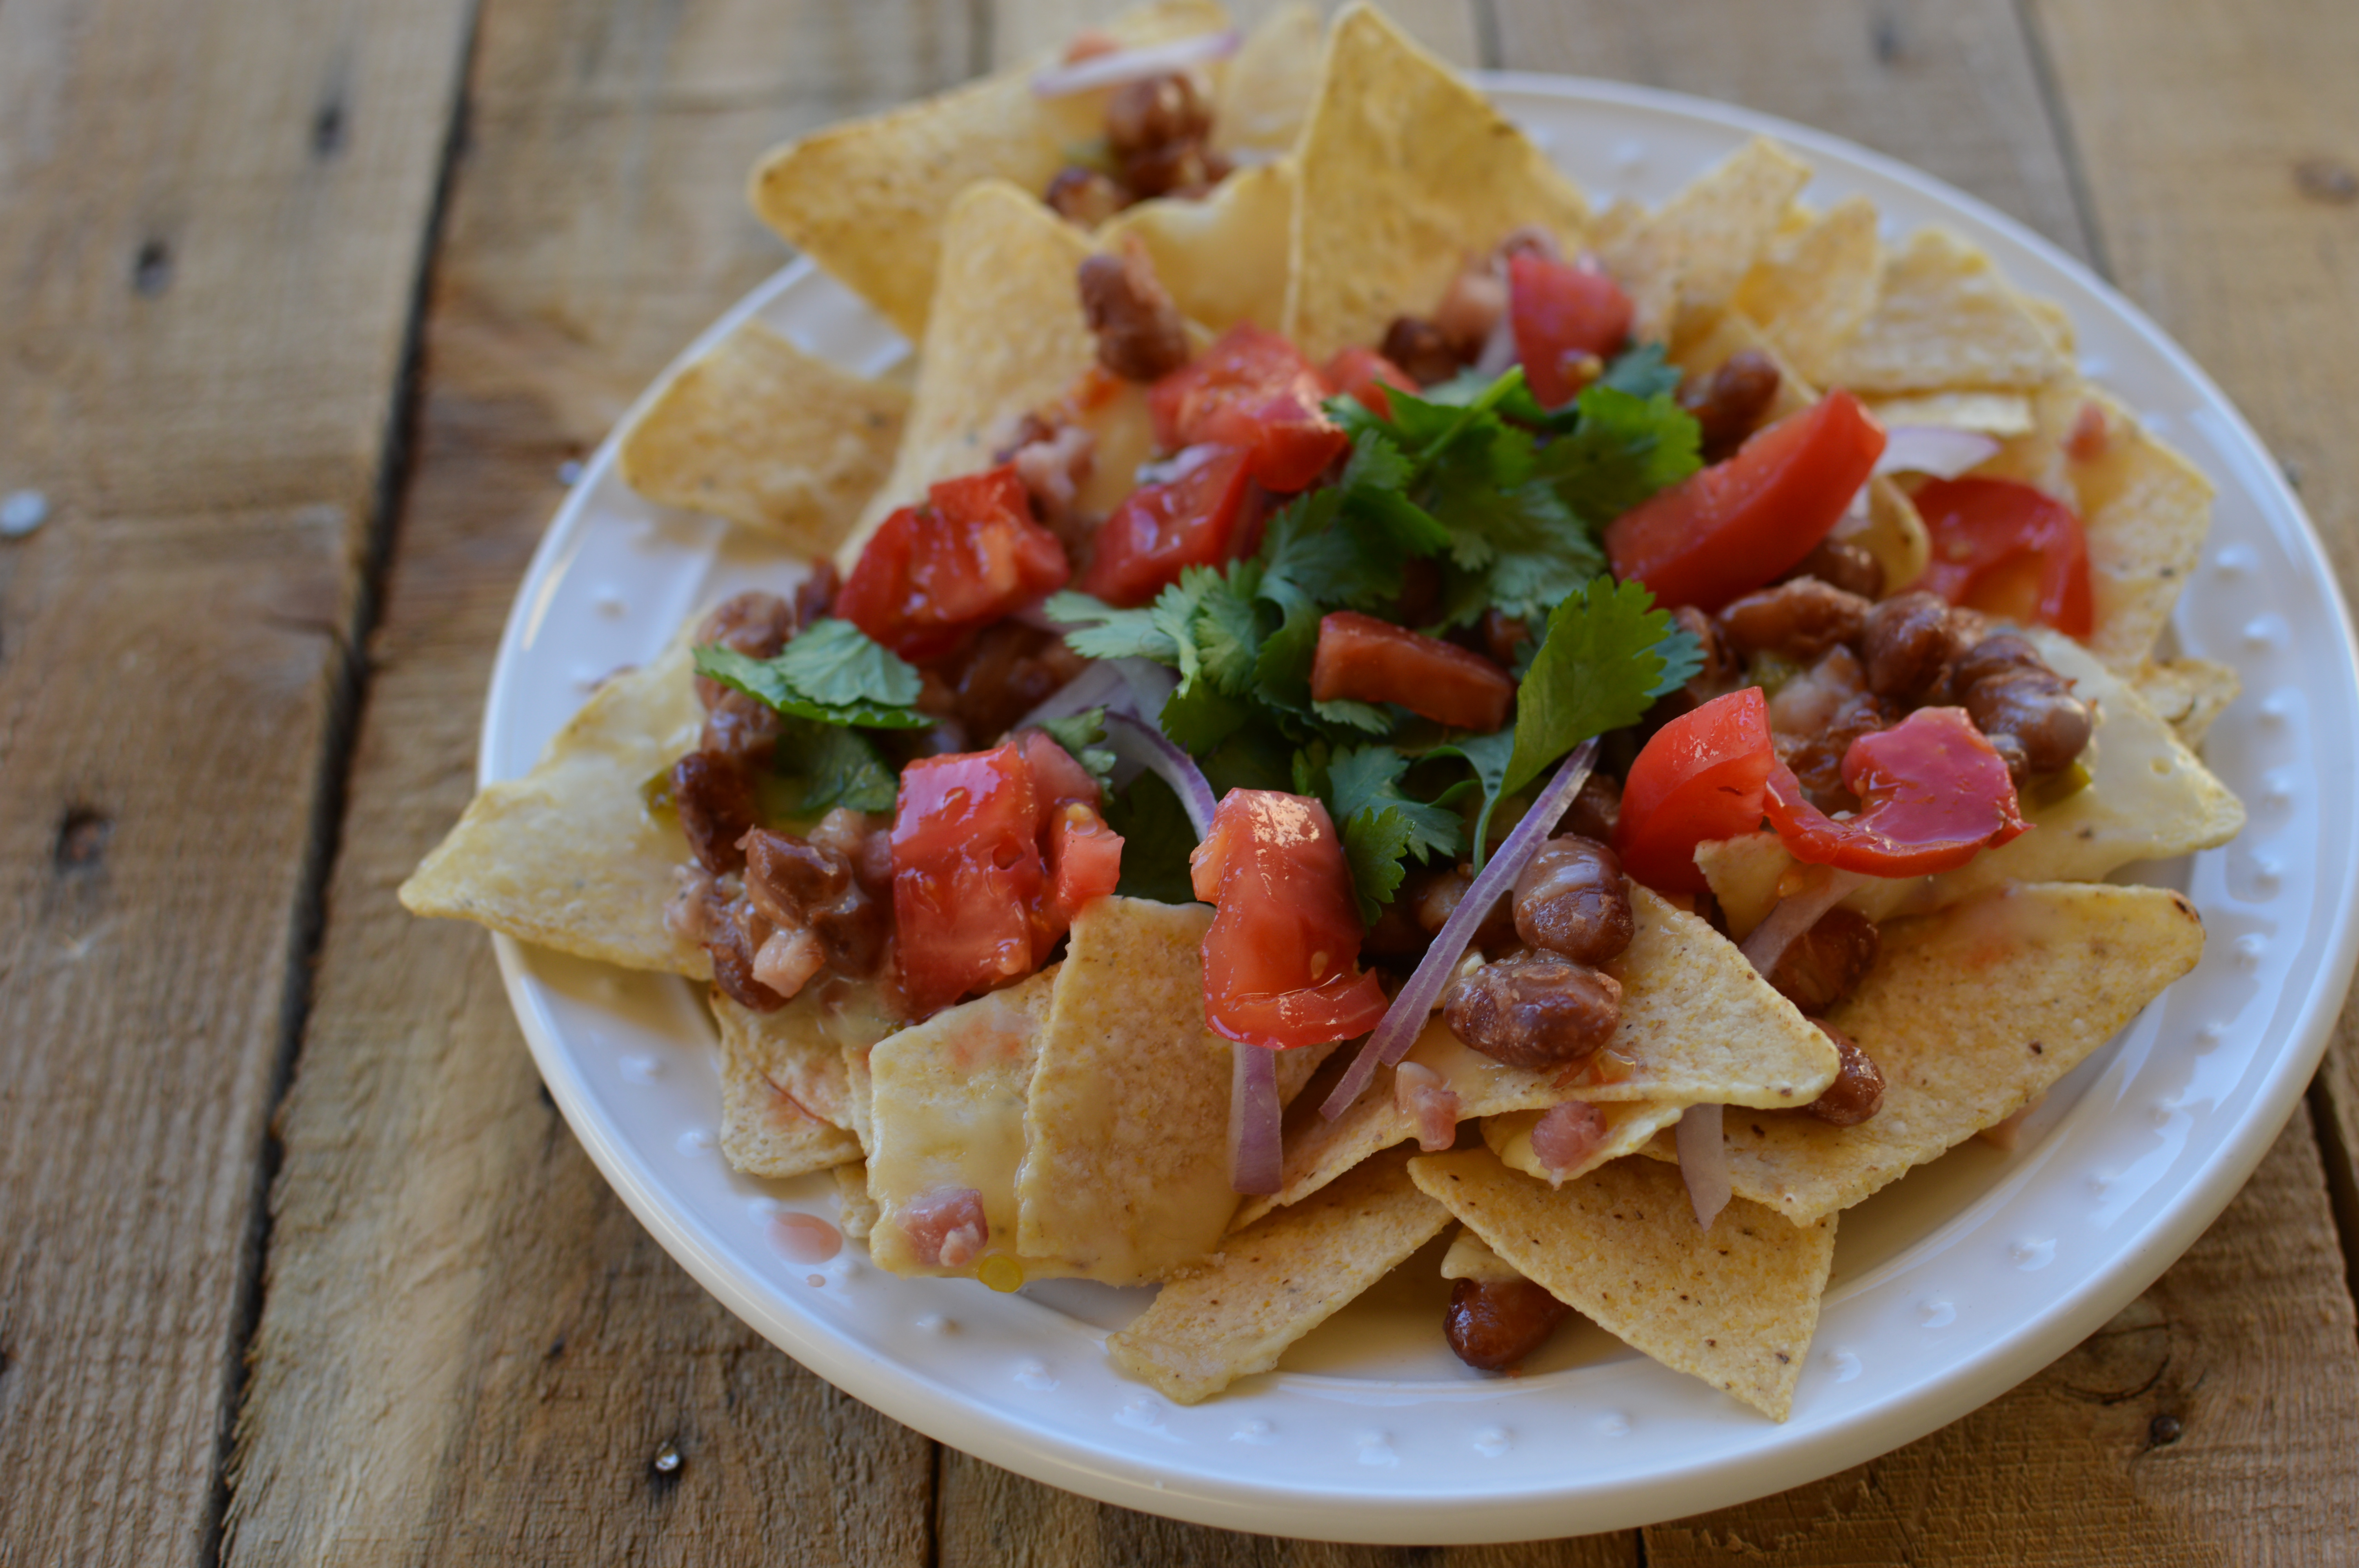
Cheddar Beer Nachos (Serves 4)
Ingredients:
1/2 Bag of baked tortilla chips (about 6-8 oz)
Cooking Spray
4 oz lean ham, chopped into 1/4″ dices
1/2 of a 15 oz Can pinto beans, drained and rinsed
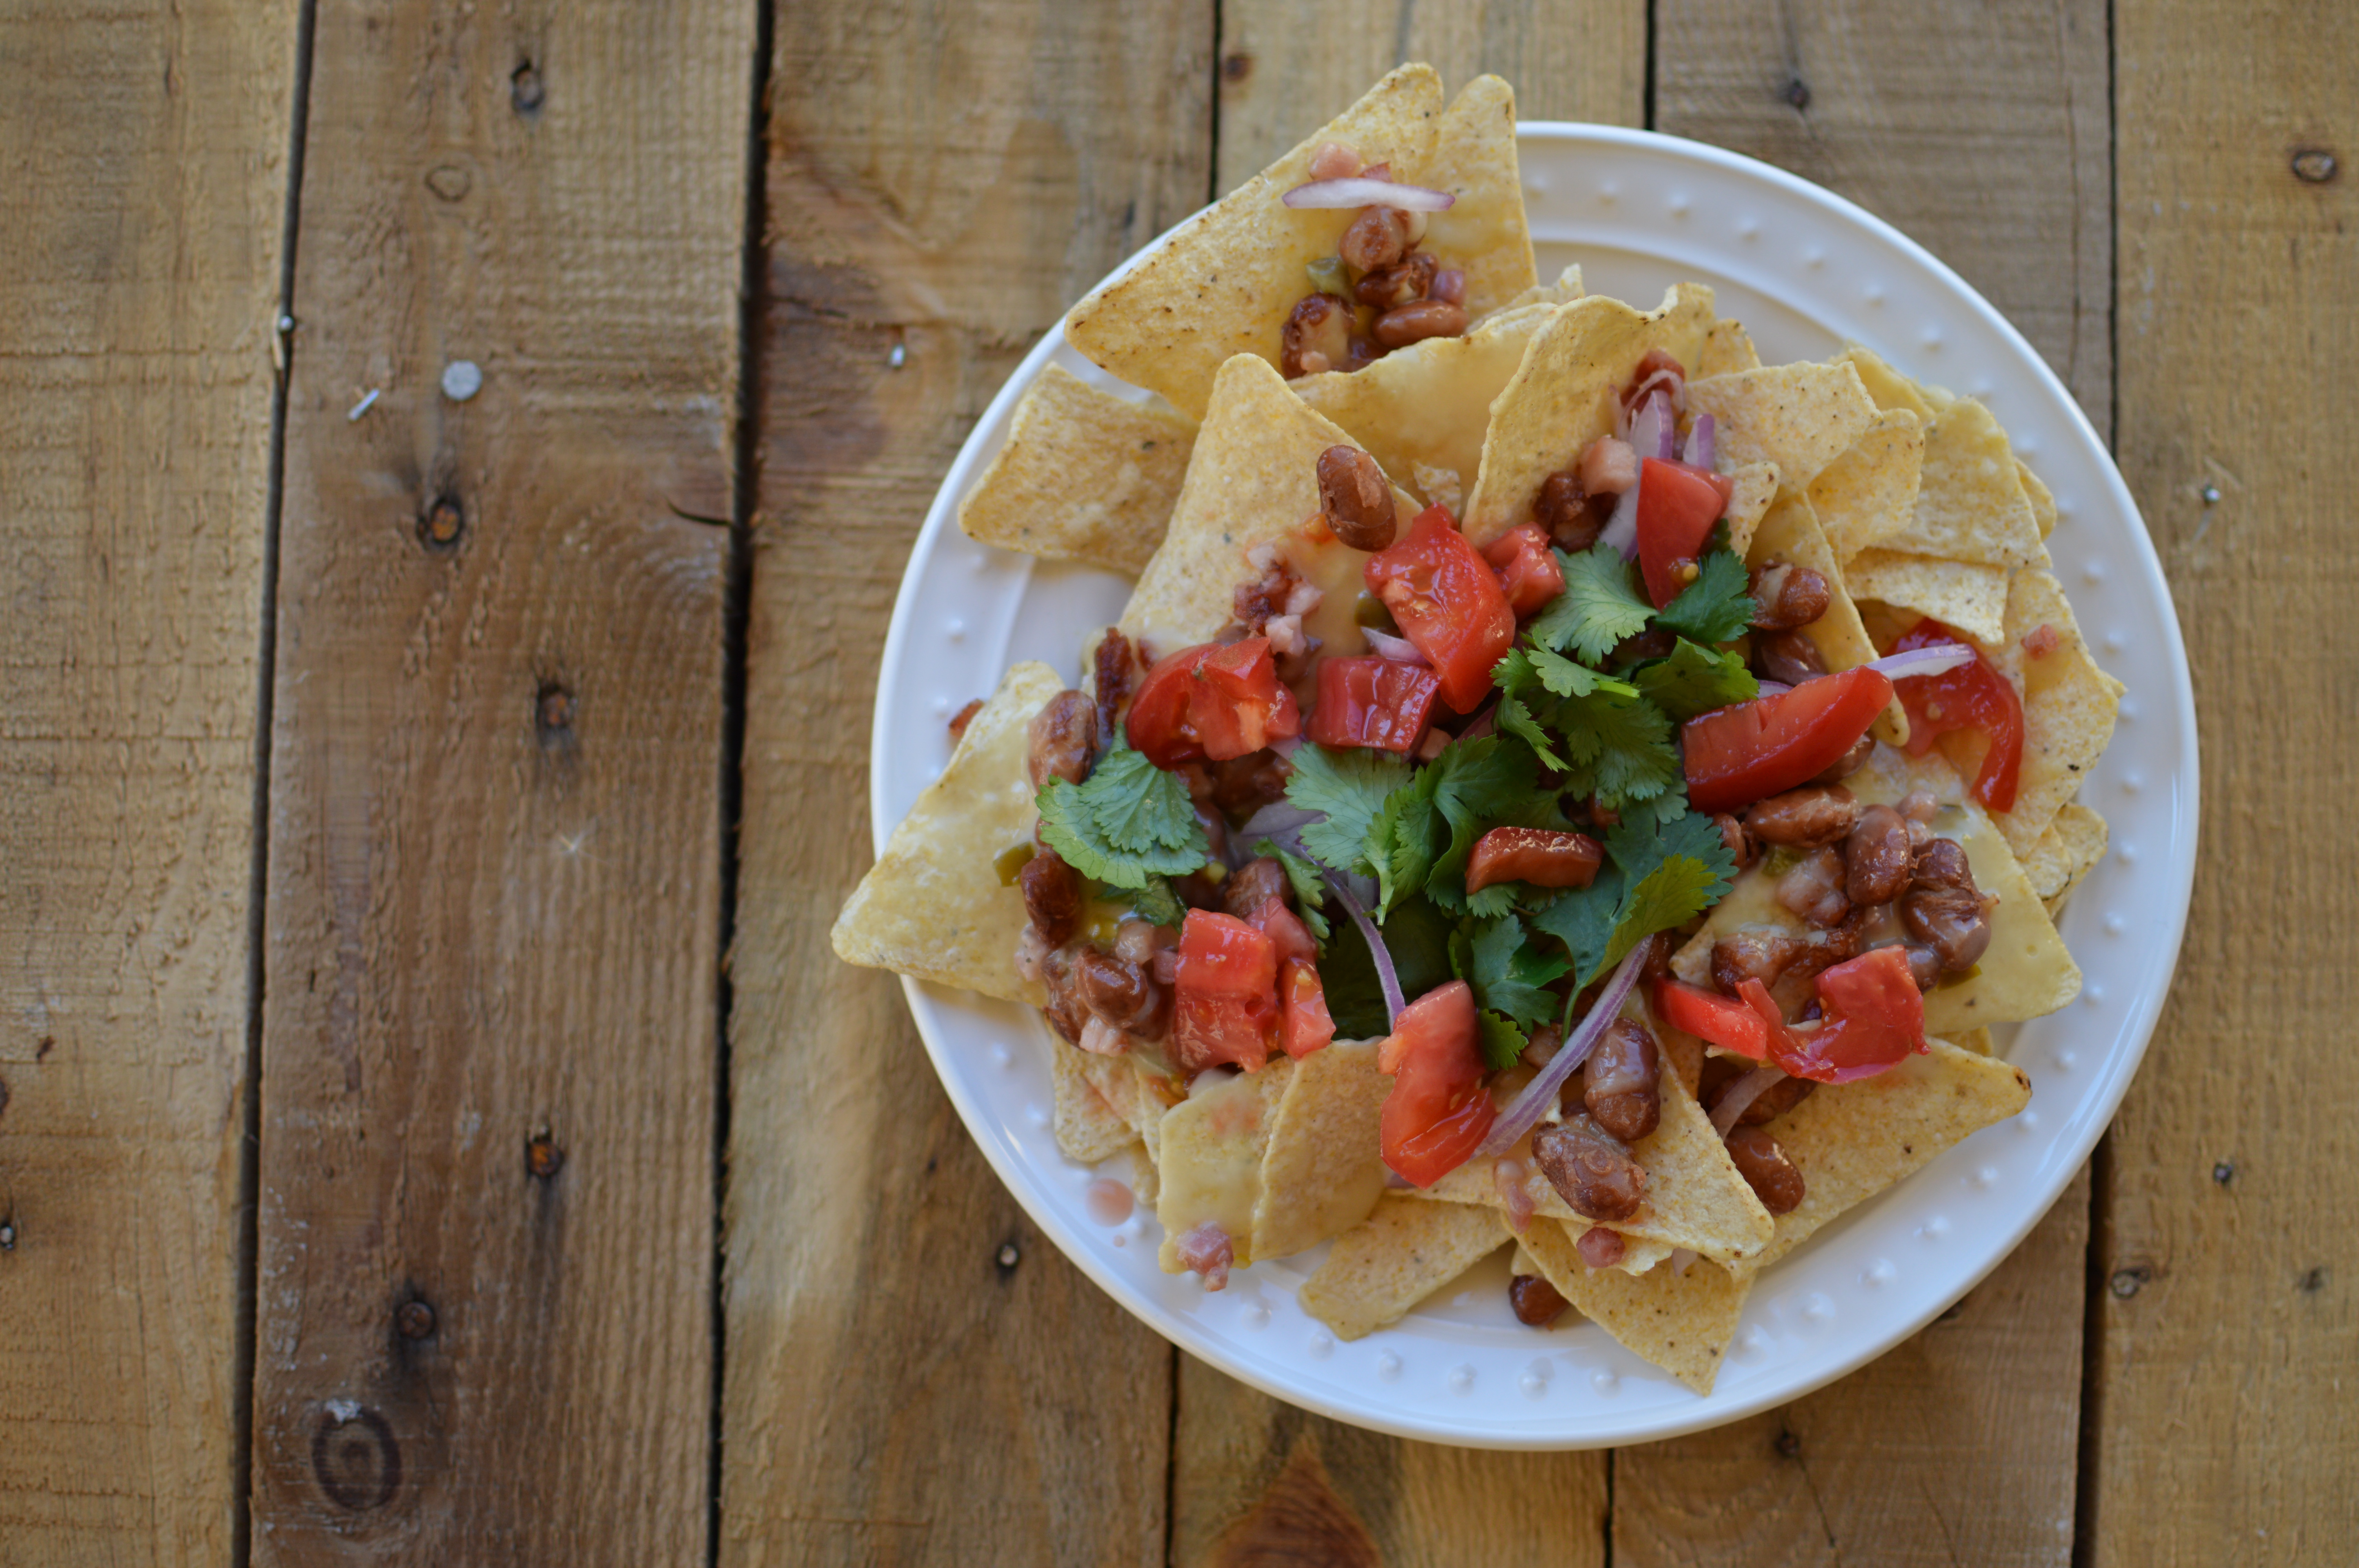
1/2 of a Tomato, diced into 1/2″ dices
1/4 Cup red onion, sliced very thin
Handful of fresh cilantro, torn into pieces

For the Cheese Sauce:-4 oz Sharp Cabot Cheddar Cheese, freshly grated
-1/2 Cup IPA or Lager Beer
-1 Tablespoon 1% milk
-1/2 Teaspoon cornstarch

Preparation:
1. Preheat the oven to 350 degrees. Place the tortilla chips on a baking sheet lined with aluminum foil in the oven to warm.
2. Heat a nonstick skillet lightly misted with cooking spray over medium-high heat. Sauté the ham dices and pinto beans, stirring occasionally for 5 minutes or until golden and crispy. Set aside.
2. Bring 1/2 cup of beer to a simmer in a small saucepan over medium-high heat.
3. Whisk in the cheddar cheese and continue whisking until melted and incorporated. To thicken the cheese sauce, add 1/2 a teaspoon of cornstarch dissolved in 1 tablespoon of cold milk. Continue whisking until thickened.
4. Sprinkle ham and beans over the warm tortilla chips. Drizzle cheese sauce over the chips, beans, and ham. Top with fresh red onion, tomato, and cilantro.
IPA Cheddar Nachos Full

*By posting this recipe I am entering a recipe challenge sponsored by Cabot Creamery and am eligible to win prizes associated with the contest. I was not compensated for my time.

Juicer Pulp Turkey Burgers

January’s Recipe Redux theme is “Start Smoking in the New Year!” The idea is to flavor up recipes with a bit of smokiness or spice. My base recipe was a turkey burger, but I wanted to find a way to bulk it up with extra vegetables and impart a smoky, savory flavor. I loved thekitchn.com’s guide to adding smoky flavor to foods! I used a few of the ideas listed for my turkey burgers. I also added some pureed vegetables leftover from my juicer to make the burgers extra moist and nutritious. If you don’t have a juicer, you can use any of your favorite grated or pureed vegetables!

2015-01-10 15.47.50

Ingredients:

1 lb 93% lean ground turkey
1/2 cup pureed or shredded vegetables (I used pulp leftover from kale, celery, and cucumber juice)
1 large egg
1/4 cup oat flour (dry instant oats pulverized in a blender)
1/2 tsp Worcestershire sauce
1 tbs minced onion
1/2 tbs minced garlic
1/2 tsp smoked paprika
1/4 tsp cumin
Salt and Pepper to taste (Don’t taste the raw meat! Instead, cook a bit of it on a hot skillet to test the flavor)
High heat stable oil, such as avocado or canola

Directions:

1. Gently fold together all ingredients in a mixing bowl until well incorporated.
2. Wet your hands to form the mixture into four 4″ diameter burger patties. Refrigerate for 20 mins – 2 hours to allow the flavors to combine.
3. Preheat the grill to medium-high. Oil the grates or the burger patties to prevent sticking. Grill 5-10 minutes and flip with a grill safe spatula. Cook until internal temperature reaches 160 degrees F. Transfer to a plate and cover with aluminum foil; temperature should increase to 165 degrees F while the burgers are resting.
4. Serve over lettuce or on toasted buns with Sriracha sauce, roasted red peppers, and pepper jack cheese.

2015-01-10 15.47.32

Check out other Recipe Redux ideas for January 2015!

Greek Yogurt White Wine Ice Cream

Why ice cream in January? Because weather in Vegas is great and I just got an ice cream maker for Christmas! Hear some of the things I’ve learned about the science of making ice cream in episode #71 of the Beta Sandwich Science Podcast. It’s amazing that all the ingredients and steps in making ice cream serve a specific purpose in making a delightfully creamy frozen treat.

Next, enjoy this delicious frozen greek yogurt “ice cream” flavored with dry white wine and a splash of lemon juice. (recipe found on serious eats, one of my favorite places to find cooking tips and recipe ideas). Like they say, the fatty and tangy Greek yogurt brings out the floral, honey, and citrus notes of dry white wine the way that a splash of water can “open up” a scotch or bourbon.

Typically, egg yolks are a helpful addition in ice cream recipes because they help to emulsify the base. In the case of Greek yogurt ice cream, the high protein content of the yogurt sufficiently emulsifies the mixture. The result is silky, tangy, and sweet. Enjoy!

2015/01/img_0161.jpg
Ingredients:
-2 cups full fat plain Greek Yogurt (I used 500g of Fage Total)
-3/4 cup sugar
-3/4 cup dry white wine
-lemon juice and salt to taste

Preparation:
1. Whisk together wine, yogurt, and sugar in a large mixing bowl until the sugar dissolves and ingredients are well incorporated.

2. Add lemon juice and salt 1/4 teaspoon at a time to adjust the flavor to your liking.

3. Process in an ice cream maker according to device instructions. (Approximately 15 minutes)

4. Dish up right away as soft serve frozen yogurt or place in the freezer for a few hours to allow it to harden more.

Because of overrun, or the increase in volume of the ice cream mixture, this recipe easily serves 8. Check out the nutrition facts below:

2015/01/img_0163.png
This would be delicious with fresh berries. I don’t think I’ll be buying fro-yo from the store anymore. Homemade Greek yogurt ice cream is just so easy and GOOD! Next time I’ll play around with subbing some of the sugar for stevia; it should be great as long as it’s served soft. Fully freezing sugar free ice creams and frozen yogurts can make them very hard, but soft serve shouldn’t be a problem.

2015/01/img_0162.jpg

Quick Southwest Black Bean and Corn Salad

Hello again! With family in town for the past week and a few weekend adventures in the weeks before that, this post is a little overdue. While this salad may sound like a summertime dish, it’s delightful any time of year as an easy side. I like to make enough for a week and toss some shredded chicken in for quick workday lunches.

Libby’s sent me samples of conveniently packaged bags of sweet peas, green beans, and whole kernel corn to play with! I was going to enter a recipe contest with my free samples, but my internet connection wasn’t allowing me to post that week. Bummer. Thanks anyway, Libby’s! I’m sure they got lots of great contest entries.

Libbys Sweet Corn

Ingredients:
(serves 6-8 as a side dish)
-1 bag of Libby’s sweet whole kernel corn OR 1 can of sweet whole kernel corn (drained)
-1 can of black beans, drained and rinsed thoroughly in a strainer
-8 oz grape tomatoes, whole or sliced lengthwise
-1/4 cup finely diced red onion
-optional: 1/2 red or green bell pepper, finely diced
Cilantro and avocado for garnish

For the dressing:
-1 tablespoon fresh lime juice (about half a lime, depending on size and juiciness)
-1 teaspoon red wine vinegar
-2 tablespoons olive oil
-1/2 teaspoon chili powder
-1/2 teaspoon cumin
-1/4 teaspoon garlic powder
-1/8 teaspoon cayenne (red) pepper
-Salt and pepper to taste

Directions:
1. Whisk together all salad dressing ingredients, or shake together in a small tupperware container.
2. Combine all vegetables in a mixing bowl. Pour the dressing over the vegetables and gently fold together using a rubber spatula. Serve chilled or room temperature. Store covered and refrigerated for up to 7 days.
black bean and corn salad

I love colorful salads, don’t you? This one is flavorful and easy to assemble. It tastes even better the next day! If you want to make it EVEN easier, try using salsa as the dressing instead of making your own vinaigrette.

black bean salad up close

Curried Lentil Soup


Hello! This is my first month participating the the Recipe Redux! This month’s theme is “spooky spices.” This recipe for curried lentil soup fits the theme because it uses several spices that I pulled out from waaaaay back in my pantry because I’m rarely brave enough to use them. Well, this soup turned out so well, I’ll have to incorporate Turmeric and Calcutta Heat into my cooking more often!

Calcutta Heat

Sometimes I cook a dish just because I have leftovers. In this case I had a little bit of chicken stock base left after making garlic butter shrimp for my husband and client. I don’t like shrimp, so I made myself a different dish on a whim. I had almost everything on hand to make this lentil soup by The Traveler’s Lunchbox. The only thing missing was cardamom, which is a fairly expensive spice that Colby and I buy EVERY year to make his German mulled wine for Christmas. It’s called feuerzangenbowle and I’ll be sure to post his signature recipe for it as the holidays approach. It involves lighting sugar and rum on fire, so it’s lots of fun to make! Anyway, we’ve bought cardamom at least twice before, yet it’s nowhere to be found in the pantry… so I improvised with spicy curry powder! The kind I use is called Calcutta Heat, which is a spicy curry blend. I suspected that the lentil soup would be strangely sweet (with nutmeg, cinnamon, and cloves), I don’t like my entrees overly sweet. Without the cardamom, the soup was missing something, so swapping in Calcutta Heat actually enhanced the soup. Try it out! It’s incredibly flavorful and warming for a chilly day.
Curried Lentil Soup

Ingredients (serves 2):

1/2 cup dry lentils
2 cups chicken stock
1 sprig fresh thyme
1/2 teaspoon turmeric
1 tablespoon butter
1/4 large onion, diced
2 cloves garlic, minced
1/2 teaspoon Calcutta Heat or curry powder & cayenne pepper
Pinch of each: nutmeg, cinnamon, ground cloves
1/4 – 1/2 cup coconut milk (depending on how creamy you like your soup- I opted for 1/4 cup)
Large handful of fresh spinach, sliced
Salt and pepper to taste

Directions:

1. Combine lentils, chicken stock, thyme, and turmeric in a small/ medium saucepan. Bring to a boil and reduce to a simmer for about 20 minutes, or until the lentils are tender. Discard the spring of thyme.

2. While the lentils are cooking, heat butter in a skillet over medium heat. When melted, add onions and stir around until tender and golden (about 2-3 minutes). Add fresh garlic, curry powder of choice, nutmeg, cinnamon, and ground cloves. Stir around until fragrant.

3. Scrape the onions and seasonings into the saucepan (if you want to get every last bit, like me, add the lentils and stock to the skillet instead). Add the coconut milk and fresh spinach.

4. Reduce the heat and simmer for about 10 more minutes. Adjust the flavor to your liking with salt and pepper. Serve hot.

Check out other Recipe ReDux recipes below!


Salt and Vinegar Kale Chips

Ahhh!! I’m so excited about my new camera! I can’t wait to learn how to use it well! I got the Nikon D3200 because it seemed like a solid beginner DSLR at a great price. The photos in this post were shot indoors just before sunset with no diffuser or reflector, and no post-processing or filters. Not bad for my first food shoot with this camera!
IMG_0156-1.JPG
I’ve had several failed attempts at kale chips, but I think I’ve finally figured out the right way to make them! Here are some tips:

1. Use curly kale

2. Cut the leaves from the tough stalk of the kale.

3. Do not over-oil the kale (use an oil mister)

4. Do not over-crowd the baking sheet

5. Watch the kale closely as it bakes so it becomes crisp but not burned

Before:

IMG_0157.JPG
Ingredients:

1 bunch of kale
Olive oil in a mister
White vinegar in a mister (or vinegar powder, such as this one)
Finely ground sea salt

Directions:

1. Preheat oven to 350 degrees. Tear curly kale into 2″ sized pieces and scatter over a baking sheet lined with lightly greased aluminum foil. Work in batches instead of crowding the baking sheet.

2. Lightly mist the kale with olive oil and vinegar. Sprinkle with a dusting of salt.

3. Bake for 8 minutes, flip the kale leaves, and bake for several minutes more. Monitor closely- you want the kale to be crisp, but not burnt.

Enjoy the kale chips warm or allow to cool and store for a couple of days in a sealed container. Experiment with other kale chip flavors as well. Try salt + curry powder, garlic salt, grated parmesan, or simply salt + pepper as tasty alternatives! Oh, and definitely brush your teeth after eating these or you might scare people off with your green breath :)

After:

IMG_0156-1.JPG

Brown Butter Sage Spaghetti Squash

Mmmmmmm…. brown butter! Ever since I had an amazing, melt-in-your mouth pasta dish with brown butter sauce at Scarpetta a while back, I’ve been wanting to recreate something rich and buttery like it at home. Unlike me, you probably already knew that brown butter sauce is actually a breeze to make! Just heat some butter and let it caramelize. Pair the easy sauce with autumn’s best squash and you have a winning combination of indulgent and nutritious!
IMG_4577.JPG
Ingredients:

1 large spaghetti squash
3 tablespoons butter
3 sage leaves, slivered
2 garlic cloves, minced
2 tablespoons chicken stock
Salt & pepper to taste

Directions:

1. Slice the spaghetti squash lengthwise, scoop out the seeds, and place cut side down in a large glass baking dish filled with 1″ of water. Microwave for 5 minutes, followed by 2 minute intervals until the skin of the squash is tender enough to pierce with a fork. (approx. 8-10 minutes)

2. Allow the squash to cool down. Once it is cool enough to handle, scrape out the insides with a fork into a bowl. The strands should come out easily. Set aside.

3. In a large skillet, melt the butter over medium heat. Add the garlic and sage leaves. Stir around for about 1 minute until fragrant. Add the chicken stock and boil about half of it off.

4. Add spaghetti squash strands to the skillet and stir to coat with butter sauce. Season with salt and pepper.

Serve the squash as a side dish or play around with accompaniments, such as bacon or grilled chicken.

IMG_4575.JPG
Enjoy!! For a sweeter, nuttier variation, skip the garlic and add a dash of cinnamon, nutmeg, and cloves to the butter and sage sauce.

IMG_4576.JPG

By the way, I’m finally getting a nice camera to do these tasty foods justice on the blog! Stay tuned for better photos as I learn to use my Nikon D3200 :)

Easy Avocado Tuna Salad

Hey there! Do you ever come home from work starving? The last thing you want to do is spend half an hour or more waiting for food to cook… On those days, this meal is for you! You probably have most of the ingredients on hand and this tuna salad is not only easy, but also delicious and healthy. The avocado lends creaminess so you can cut back on the amount of mayonnaise you may typically use in a tuna salad. Avocado’s fiber and healthy fats along with the protein in the tuna will keep you full for a few hours until your next meal. Whip this up in 5 minutes or less!

IMG_0007.JPG
Ingredients:
1 ripe avocado, medium
2 cans albacore tuna, drained
2 tablespoons mayonnaise
1 teaspoon dijon mustard
1/2 cup finely diced celery
1/4 cup finely diced red onion
Salt, pepper, garlic powder, and parsley (fresh or dried) to taste

Directions:
1. Combine all the ingredients in a large bowl and mash together with a fork until well blended. Serve on toasted whole wheat bread, wedges of fresh pell pepper, or in leaves of butter lettuce.

IMG_0006.JPG

Sriracha Cauliflower

I was definitely skeptical about the idea of “hot wing” cauliflower until I actually tried it. This is by far the most delicious way I’ve eaten cauliflower! Even if you’re not a big fan of this cruciferous vegetables, I strongly suggest that you try it this way. The roasted flavor with the spiciness of the hot sauce is really on point. You might even eat a whole head of cauliflower in one sitting like I did.

IMG_0008.JPG
Ingredients:
1 /2 head of cauliflower, broken into florets
Olive oil, in a spray bottle (such as the Misto)
Salt, pepper, and garlic powder, to taste
1 tablespoon butter + 1 tablespoon olive oil
1/4 cup Frank’s Red Hot Sauce
2 tablespoons (or more!) Sriracha chili sauce

Directions:
1. Line a baking sheet with aluminum foil and spray with olive oil. Lay the cauliflower florets on the aluminum foil in a single layer and spray with additional olive oil until lightly coated.
2. Bake the cauliflower at 400 degrees F for about 25 minutes, or until the cauliflower is tender and starting to brown slightly.
3. Melt the butter with olive oil in a large skillet. Add the cauliflower and cook until it’s browned on all sides, about 5 minutes.
4. Turn the heat off and add salt, pepper, garlic powder, and hot sauces. This part can be adjusted to your taste preferences. If you like it saucy, add more Frank’s. For a spicier cauliflower, get heavy handed with the Sriracha squirt bottle.

Enjoy!

IMG_0009.JPG